How to Create Digital STL Files and Sell Them on Cults3D and MyMiniFactory
Master the art of creating digital STL files from your 3D models. This guide then shows you how to effectively sell your creations on Cults3D and MyMiniFactory.

Ever look at your 3D printer whirring away, spitting out another cool trinket, and think, "Man, I wish I could make some actual rupees from this passion"? We've all been there, right? I mean, who wouldn't want to turn their late-night CAD sessions and filament addiction into something more than just a really impressive collection of functional prints and display models? The thing is, you absolutely can! And no, I'm not talking about starting a massive print farm (though that's cool too). I'm talking about selling your *digital designs* – those magical STL files – to a global audience. It's a game-changer, honestly, and it's how I've been building Artopia Collections, little by little, from my small setup here in India. Let's dive into how you can create your own digital masterpieces and sell them on platforms like Cults3D and MyMiniFactory. Trust me, it's not as daunting as it sounds.
From Idea to STL: Crafting Your Digital Gold
So, you've got an idea. Maybe it's a super functional organizer for desk clutter, a ridiculously cute figurine, or a replacement part that nobody else seems to make. That's the first, most crucial step. But how do you take that idea from your brain and turn it into a print-ready STL file? It all starts with software, my friend.
Choosing Your Weapon: 3D Modeling Software
This is where many people get intimidated, but don't! There are tons of options, and many are either free or have free hobbyist licenses.
- Tinkercad: The Friendly Giant. If you're an absolute beginner, or just want to quickly whip up simple, geometric designs, Tinkercad is your best friend. It's web-based, incredibly intuitive, and honestly, surprisingly powerful for what it is. I've used it to teach kids, and they pick it up in minutes. Great for functional prints, basic organizers, or customizing existing shapes.
- Fusion 360: The Professional's Freebie. Okay, so it's not "free" free, but Autodesk offers a very generous personal use license for hobbyists and small startups (under ₹8,00,000 turnover, last I checked, which is pretty sweet for us in India). This is a parametric modeling powerhouse. Meaning, you can go back and change dimensions, angles, and features at any point, and the entire model updates. It’s fantastic for functional designs, mechanical parts, enclosures, and anything that needs precision. There's a learning curve, but YouTube tutorials are abundant, and it's well worth the effort. My personal workflow often starts here for anything needing exact dimensions.
- Blender: The Artistic Marvel. If you're leaning more towards organic shapes, intricate sculptures, or character models, Blender is an absolute beast. And guess what? It's completely free and open-source! But yeah, it’s a steep learning curve. Think of it as painting versus engineering. While Fusion 360 is like building with LEGOs, Blender is like sculpting with digital clay. It's incredible for creating those highly detailed figurines or decorative pieces that really catch the eye. I dabble in Blender for more artistic stuff, but my primary bread and butter usually comes from Fusion 360 for utility items.
- ZBrush / Nomad Sculpt: For the Serious Sculptors. These are premium tools. ZBrush is the industry standard for digital sculpting, used by pros in film and games. Nomad Sculpt is a fantastic, more affordable iPad app that's incredibly powerful for on-the-go sculpting. If your niche is high-detail miniatures or intricate busts, these are worth exploring once you're comfortable with the basics.
Honestly, pick one and stick with it until you're comfortable. Don't try to learn them all at once. For most beginners looking to sell functional prints or simple display pieces, Fusion 360 (personal license) is probably the best all-rounder. But if your heart sings for goblins and dragons, start with Blender.
Designing for Printability: This is CRITICAL
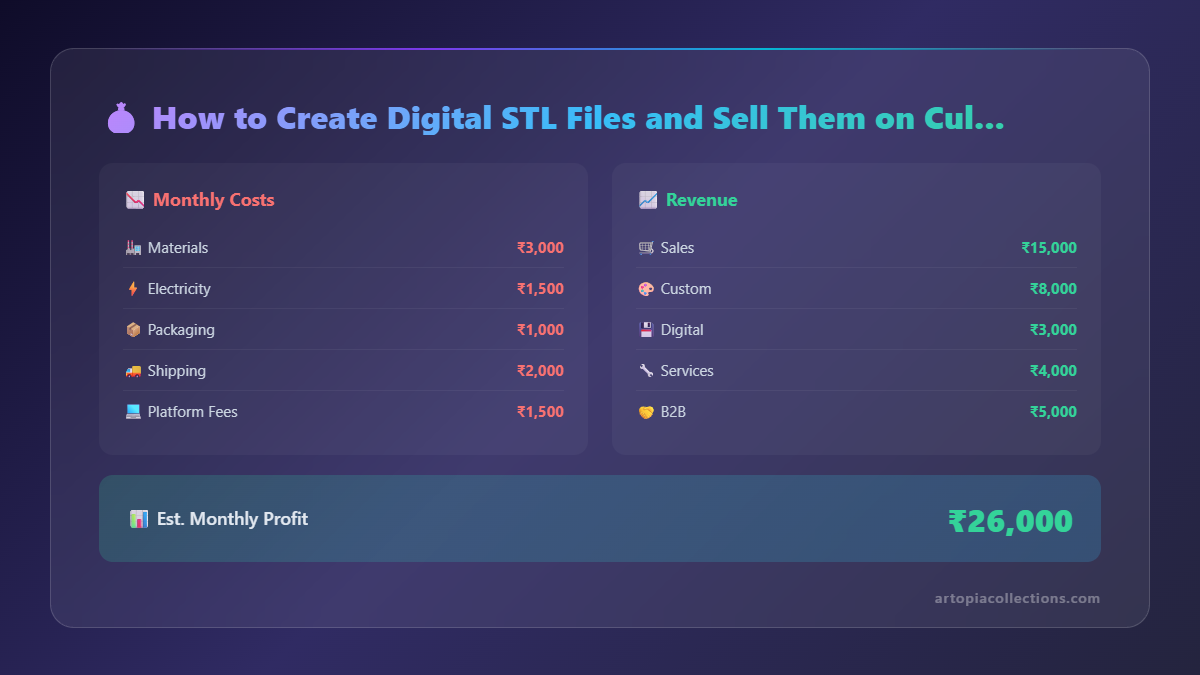 Look, it doesn't matter how amazing your design looks on screen if it's a nightmare to print. When you're designing for sale, you're not just designing for your printer; you're designing for potentially hundreds of different printers, with different skill levels. Keep these things in mind:
- Minimize Supports: Every bit of support material is wasted filament, wasted print time, and extra post-processing for your customer. Design smart. Can you split a model into multiple parts? Can you add chamfers or fillets to overhangs?
- Tolerances: If your model has interlocking parts or needs to fit onto something else, make sure you account for print tolerances. A 0.2mm gap is a good starting point for a loose fit on an FDM printer, but test, test, test!
- Wall Thickness: Don't make walls too thin (less than 1.5mm usually) unless it's a specific, decorative filigree. Thinner walls can be fragile or difficult to print reliably.
- Flat Bases: Ensure your model has a nice, flat surface to sit on the build plate. This helps with adhesion and stability during printing.
- Details: If you have tiny text or intricate details, ensure they are large enough to be resolved by a standard 0.4mm nozzle. A line thickness of at least 0.8mm for details is a good rule of thumb.
And then you print it. On your own printer. Probably multiple times. I've got a trusty Creality Ender 3 S1 that's seen more prototypes than finished models, just for testing my designs. It's an investment, but it pays off when you create a reliable, easy-to-print file.
Preparing Your Files for the Marketplace
Once your digital baby is perfected and prints beautifully, you need to package it up nicely. This isn't just about the STL; it's about the entire experience you're selling.
The STL Itself
Make sure your STL file is "manifold" or "watertight." This basically means it's a solid, closed object without any holes or weird geometry that would confuse a slicer. Most modeling software will export a clean STL, but tools like MeshMixer (free) or the built-in repair functions in slicers like PrusaSlicer or Cura can help fix issues if they arise.
Slicing Profiles & Instructions
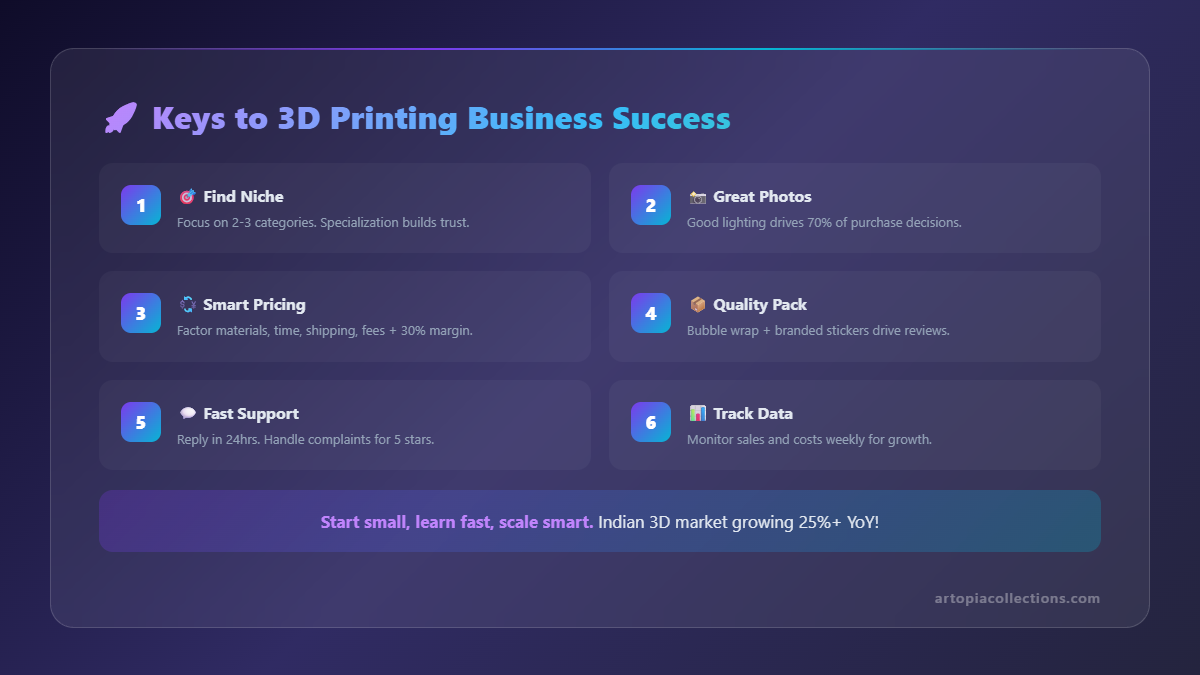 I highly recommend including suggested print settings. You don't need to write a novel, but a simple text file with "Recommended settings: 0.2mm layer height, 15-20% infill, no supports (or specific support placement), PLA filament, 0.4mm nozzle" can save your customers a lot of headaches. If your model is multi-part, include a clear assembly guide, maybe with photos or even a simple diagram. This really enhances the value and customer satisfaction.
High-Quality Photos & Renders
This is arguably the most important part of selling your STLs. People buy with their eyes!
- Printed Examples: ALWAYS print your model and take excellent photos of the physical print. Use good lighting (natural light near a window is great), a clean, uncluttered background, and multiple angles. Show off the details.
- Renders: If your modeling software can do it (Fusion 360 has a decent rendering workspace, Blender is amazing), create some high-quality digital renders too. These can show off the model's complexity or ideal form before printing.
- Lifestyle Shots: Can your model be used in a real-world setting? Show it! If it's a desk organizer, show it on a desk with pens. If it's a figurine, show it proudly displayed.
- File Naming: Keep it clean and descriptive. "MyCoolDesign_Part1.stl," "MyCoolDesign_Base.stl," etc. Avoid "final_final_version2.stl" (we've all done it, haha).
Selling Your Digital Gems: Cults3D vs. MyMiniFactory
Now that your files are pristine and your photos are dazzling, it's time to put them out there. Cults3D and MyMiniFactory are two of the biggest and best platforms for selling 3D models.
Cults3D: The Open Marketplace
Cults3D is fantastic for getting started. It's a very open platform, meaning you can sign up and start uploading pretty quickly.
- Pros:
- Easy to get started.
- Good visibility for new designers.
- Solid commission structure (you typically get 80% of the sale price, which is quite good).
- Large, active community.
- Cons:
- Can be a bit saturated, so standing out requires effort.
- Less curation, meaning you might find a wider range of quality.
Uploading is straightforward. You create a designer account, fill out your profile, and then hit "Sell my files." You'll add your title, a detailed description (use keywords!), upload your STL, photos, and any supplemental files (like those print instructions). Then you set your price. It's linked to PayPal for payouts, so make sure you have that sorted.
MyMiniFactory: The Curated Experience
MyMiniFactory is a bit different. They pride themselves on having a more curated collection of high-quality models. This means getting accepted as a designer can take a little longer.
- Pros:
- Higher perceived quality due to curation.
- Very designer-friendly community and support.
- "Tribes" feature: their version of Patreon, allowing you to offer monthly subscriptions to your fans for exclusive content, which can be a stable income stream.
- Good for building a loyal following.
- Cons:
- Application process: you need to submit some of your best work for review before you can sell.
- Slower to get started.
- May be slightly more restrictive on what they accept.
To sell on MyMiniFactory, you first apply to become a designer. They'll ask for examples of your work, social media links, etc. Once accepted, the upload process is similar to Cults3D, focusing on clear descriptions, excellent visuals, and well-prepared files. The Tribes feature, in particular, is something I'm actively exploring. Imagine a recurring income from your most dedicated fans! It's super appealing.
Pricing Your Masterpieces: Don't Undersell Yourself!
This is often the trickiest part for new designers. How much is your time and creativity worth?
- Simple, Small Items: For something like a basic coaster, a simple articulated toy, or a small organizer, you might price it anywhere from ₹150 to ₹350.
- Medium Complexity: A more intricate figurine, a multi-part functional print, or a larger decorative piece could easily fetch ₹500 to ₹1500.
- Complex, Multi-Part Models or Collections: For something truly unique, highly detailed, or part of a larger collection (think a full articulated action figure or an intricate diorama), you can charge upwards of ₹2500, especially if it includes multiple variations or modular components.
Research what similar designs are selling for. Don't be the cheapest, but be competitive. Remember, you're selling a digital product that can be downloaded an infinite number of times. That's pure profit after the initial design time.
Spreading the Word: Marketing Your Designs
You've got amazing designs; now tell the world!
- Social Media: Instagram, Facebook groups (especially 3D printing ones!), Twitter, even Reddit. Post those beautiful photos and renders. Use relevant hashtags like #3dprinting #stlfiles #3dmodel #cults3d #myminifactory #3ddesign.
- Your Own Portfolio: Consider having a simple website or even a dedicated Instagram page where people can see all your work. I use my Artopia Collections site to showcase some of my own stuff, including physical prints and kits, but it also links out to my digital stores. Check it out if you want an example: Artopia Collections Products. Having your own space makes you look more professional.
- Collaborate: Reach out to 3D printing influencers or reviewers. Offer them a free copy of your STL in exchange for an honest review or feature.
- Cross-Promote: If you're on both Cults3D and MyMiniFactory, make sure each listing links to your profile on the other.
A Few Final Thoughts from My Journey
Honestly, this isn't a get-rich-quick scheme. It takes time, effort, and a whole lot of passion. But it's incredibly rewarding. I've learned so much about design, marketing, and customer service since I started Artopia. You'll make mistakes; I certainly have. Some designs won't sell as well as you hoped. Some customers might have tricky printers. But every single one of those experiences is a learning opportunity.
Oh, and one more thing: Intellectual Property. Be careful. Don't just download someone else's model, tweak it a bit, and try to sell it. Create your own original work. It’s better for your reputation and keeps you out of legal trouble. There's a huge demand for original, well-designed 3D printable files, especially here in India where the 3D printing community is growing like crazy.
So, what are you waiting for? Dust off that modeling software, fire up your printer (maybe grab some good quality eSun PLA filament to test your prototypes), and start transforming those digital dreams into tangible income. I'm telling you, the feeling of getting that first sale notification is absolutely magical. You've got this!


