How to 3D Print Miniatures: Complete Guide from STL to Painted Model
This complete guide will teach you everything you need to know about 3D printing miniatures, from sourcing STL files to perfecting your print settings. Learn how to post-process, prime, and paint your models to bring them to life on the tabletop.

Unleash Tiny Worlds: Your Complete Guide to 3D Printing Miniatures (STL to Painted Masterpiece!)
Oh man, the first time I saw a tiny, perfectly detailed goblin Iâd pulled off my print bed, still warm from the nozzle, I swear my jaw hit the floor. It was like magic, pure and simple. And then, painting it? That's when the real soul gets breathed into these little guys. If youâre anything like me, youâve probably spent hours drooling over incredible miniature sculpts online, maybe even wondering if *you* could make them come to life. Well, my friend, you absolutely can! And trust me, itâs not as daunting as it looks, especially when youâre armed with a bit of know-how. Here at ArtOpia, we live and breathe this stuff, and today, I'm going to walk you through everything, from hunting down that perfect STL file to giving your miniature its final, glorious coat of paint. Letâs dive in!
Step 1: The Great STL Hunt â Finding Your Tiny Treasure
First things first, you need a model! This is where the digital world meets your printer. Youâre looking for an STL file, which is basically the 3D blueprint for your miniature. There are tons of places to find them, both free and paid, and honestly, the quality varies wildly. So, choose wisely!
- MyMiniFactory: This is my go-to for premium, high-quality sculpts. Many professional artists upload their work here, and while some are paid, the detail is usually worth every rupee.
- Cults3D: Another fantastic marketplace. You'll find a mix of free and paid models, often with unique styles.
- Patreon: Seriously, if you're into miniatures, especially for games like D&D or Warhammer proxies, supporting a Patreon artist is a game-changer. For a monthly subscription (often around â¹500-â¹1500), you get a treasure trove of new STLs every single month, sometimes even welcome packs with dozens of models. It's how I get a lot of the cool stuff for our own custom orders.
- Thingiverse: Great for free models, but you might have to dig a bit. Quality can be hit or miss, but you can find some hidden gems, especially if youâre looking for props or terrain pieces rather than character models.
A quick tip: If you're planning to sell prints, even occasionally, always double-check the licensing. Many artists offer commercial licenses through their Patreons or specific tiers on marketplaces. Itâs important to respect their work!
Step 2: Slicing for Success â The Magic Between File and Filament
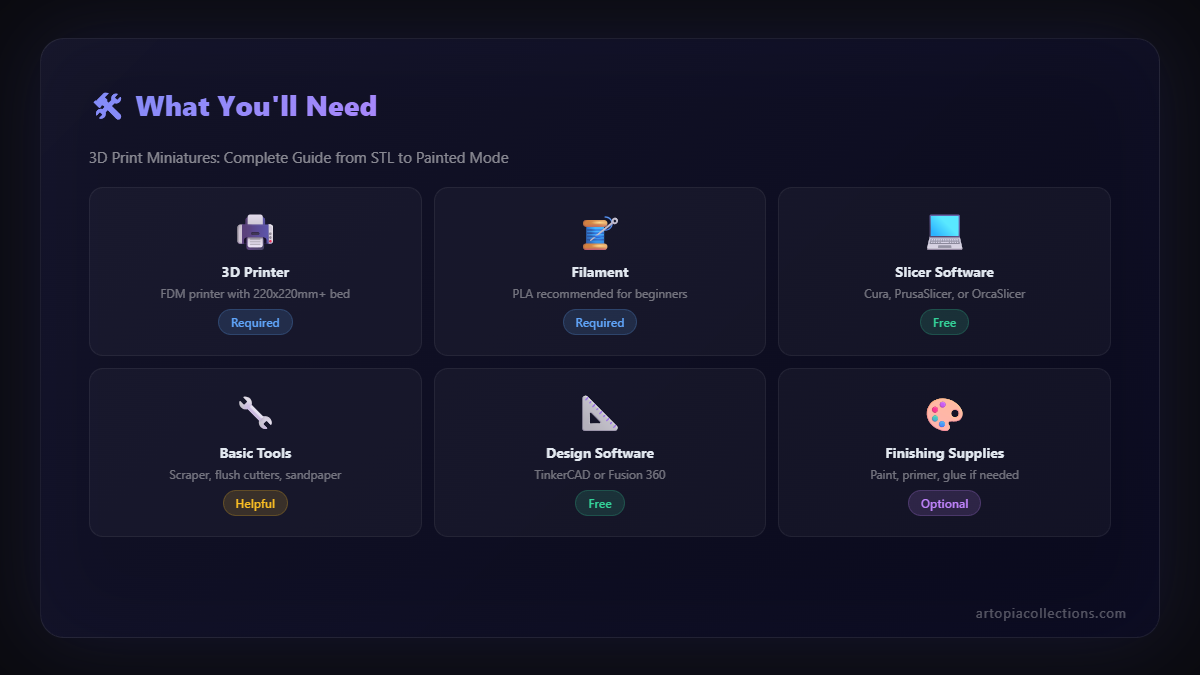
Okay, youâve got your STL. Now, how do you tell your printer to make it? Thatâs where a "slicer" software comes in. I personally use Ultimaker Cura for my FDM printers and Chitubox for my resin ones. PrusaSlicer is also excellent. This software takes your 3D model and "slices" it into hundreds (or thousands!) of thin layers, generating the G-code your printer understands.
This is arguably the *most critical* step for miniatures. Your settings here will make or break your print. Seriously, don't skimp on this part. Here are the crucial settings I tweak:
For FDM Printers (like your trusty Ender 3):
- Layer Height: This is HUGE. For miniatures, you want tiny layers. I usually go with 0.12mm, or even 0.08mm for super-fine detail. Standard prints are often 0.2mm, but thatâs too chunky for tiny models.
- Nozzle Size: A 0.4mm nozzle is standard, and it works pretty well. But if youâre hardcore about detail, a 0.2mm nozzle can work wonders â just be prepared for longer print times and potentially more clogs (personal experience, ugh).
- Print Speed: Slow and steady wins the miniature race. Seriously, I print minis at around 30-40mm/s. Slower means less vibration, better layer adhesion, and more accurate details.
- Infill: Miniatures are small and don't need much strength. 10-15% infill (often grid or lightning pattern) is usually plenty. No need to waste filament!
- Supports: This is where things get tricky. Miniatures often have overhangs, arms, weapons, and other bits floating in the air. You absolutely need supports.
- Tree Supports: Cura's tree supports are a godsend. They're easier to remove and leave fewer marks than standard supports. Experiment with their density and angle settings.
- Support Placement: I often manually place additional supports in Cura where I know there might be issues, like under a character's chin or fingertips.
- Support Interface: A dense support interface (like a few solid layers between the support and the model) can make removal cleaner.
- Support Z Distance: Play with this! A slightly larger gap (0.2-0.3mm) can make supports easier to remove, but too large, and your overhangs will sag.
- Retraction Settings: Crucial for avoiding stringing, which looks awful on tiny models. Fine-tune your retraction distance and speed until you get minimal wisps. Every filament is different, so you'll need to experiment.
- Cooling: Make sure your part cooling fan is at 100% after the first few layers. This helps solidify each tiny layer quickly, preventing warping and improving detail.
For Resin Printers (if you've ventured into the sticky side):
Resin printing is a whole different beast but delivers unparalleled detail. Your slicer (like Chitubox or Lychee Slicer) will have different settings:
- Layer Height: Typically even finer, 0.05mm is standard, and you can go down to 0.025mm for insane detail.
- Exposure Time: This depends on your resin and printer. Too short, and your print won't stick; too long, and you lose detail. Always do calibration prints!
- Lift Speed/Distance: Slower lift speeds reduce stress on the print, especially for delicate miniatures.
- Supports: Resin supports are usually thin "pins" that attach to the model. Auto-supports are a good starting point, but manual tweaking is almost always needed. Angle your model to minimize large cross-sections and hide support marks.
Step 3: The Right Tools for the Job â Your Printer and Filament/Resin
Alright, letâs talk hardware. Which printer is best for miniatures? The honest answer is: it depends on your budget and what kind of detail you absolutely need.
FDM Printers (Filament)
These are fantastic for getting started, they're generally cleaner, and the filament is cheaper. You can get really good detail with the right settings and a well-tuned printer. I use an Ender 3 V2 quite a bit for larger models or terrain pieces, and it's a workhorse. Newer models like the Anycubic Kobra 2 or Creality K1 also offer great speed and quality.
- Pros: More affordable (an Ender 3 V2 can be around â¹20,000-â¹25,000), less messy, safer, wider material choice.
- Cons: Visible layer lines (even with fine settings), harder to capture super-fine details like hair or tiny buckles.
- Filament: I almost exclusively use PLA for miniatures. It's easy to print, paints well, and is durable enough. Brands like eSUN, 3Ding, or even local Indian brands offer great quality. Expect to pay around â¹1000-â¹1800 for a 1kg spool of good PLA like this.
Resin Printers (SLA/DLP)
If you crave *insane* detail, resin is your answer. This is where those tabletop gaming miniatures truly shine. I've got an Anycubic Photon Mono and an Elegoo Mars 3, and they consistently blow me away with the crispness. But be warned, it's a messier and smellier process!
- Pros: Unbelievable detail, smooth finish, no visible layer lines.
- Cons: More expensive upfront (a good entry-level like a Photon Mono 2 or Elegoo Mars 3 will set you back â¹18,000-â¹25,000), resin is toxic and messy (gloves, masks, ventilation are a must!), requires post-processing (washing and curing).
- Resin: Standard grey resin is my usual choice as it shows detail best for painting. Brands like Anycubic, Elegoo, and Phrozen are popular. Expect to pay â¹2000-â¹3500 for a 1kg bottle.
Step 4: The Print Itself & Post-Processing
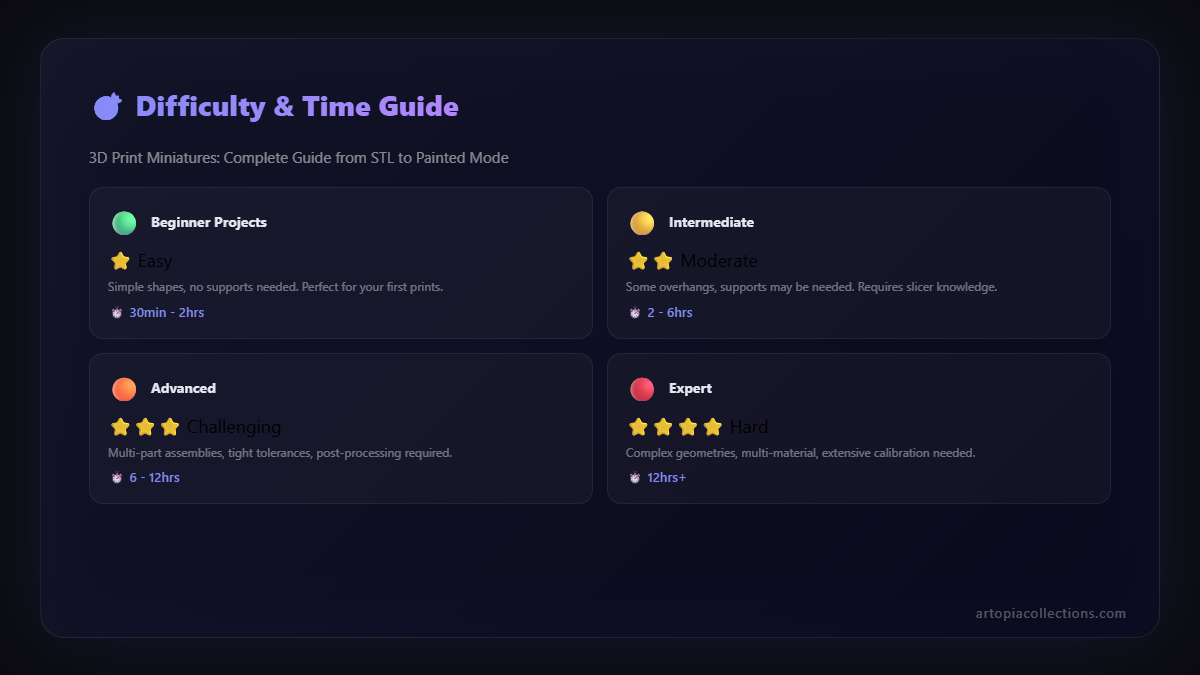
Youâve sliced, youâve loaded your printer. Now for the exciting (and sometimes nerve-wracking) part! For FDM, watch that first layer like a hawk. Make sure it's sticking perfectly. If it lifts, your print is basically doomed. After that, itâs mostly a waiting game. Once done, carefully remove the supports. A good pair of flush cutters and an X-Acto knife are your best friends here. You might need some light sanding (180-400 grit) to smooth out any support marks or imperfections.
With resin, the process is a bit more involved:
- Print: Once the print finishes, carefully remove the build plate.
- Wash: Submerge your print in IPA (Isopropyl Alcohol) to wash off uncured resin. I use a dedicated wash station, but two tubs of IPA and a soft brush work too.
- Support Removal: This is easier when the model is still a bit flexible from the wash. Again, flush cutters are key.
- Cure: Place your print in a UV curing station (or just indirect sunlight for several hours) to fully harden it. Be careful not to overcure, as it can make the resin brittle.
Step 5: Bringing Them to Life â Painting Your Masterpiece!
This is where the real artistry happens! Taking a plain plastic or resin model and turning it into a vibrant character is incredibly rewarding. Trust me, even basic painting techniques can make your miniatures pop.
- Priming: This is essential! Primer gives the paint something to adhere to and creates a uniform base color.
- Spray Primer: Fast and easy. Grey, white, or black are common choices. Rust-Oleum or Asian Paints Apex for plastics work well, costing around â¹300-â¹500 a can.
- Brush-on Primer: Good for smaller batches or if you don't have good ventilation. Vallejo or Citadel primers are excellent but pricier.
- Basecoating: Apply your main colors to different areas of the miniature. Donât try to get full coverage in one thick coat; two or three thin coats are always better. I use acrylic paints â for professional results, brands like Citadel, Vallejo, or Army Painter are fantastic (around â¹200-â¹300 per pot). For more budget-friendly options, brands like Fevicryl Acrylic Colors (â¹50-â¹80 a bottle) work surprisingly well, especially if you thin them down properly!
- Washes/Shading: This is a game-changer! Washes are thin, ink-like paints that flow into the recesses of the model, creating shadows and depth. Apply liberally over basecoated areas, then wick away excess with a clean brush. Citadel Nuln Oil and Agrax Earthshade are legends for a reason.
- Layering/Highlighting: Once the wash is dry, re-apply your base color, leaving the shaded areas untouched. Then, mix a lighter version of your base color (add a tiny bit of white or a brighter analogous color) and apply it to the raised areas and edges. This makes the model look less flat and really pop. Don't go too crazy, a little goes a long way.
- Drybrushing (Optional but effective): Dip your brush in a light color, wipe almost all the paint off on a tissue, then lightly drag the brush over raised textures. This quickly catches edges and adds texture.
- Eyes & Fine Details: These require a steady hand and a very fine brush. Don't be afraid to take your time or practice on something else first.
- Varnishing/Sealing: Once all the paint is dry, apply a clear varnish to protect your hard work. Matte varnish is common for miniatures as it keeps the realistic look. A spray varnish is easiest, but brush-on options exist too.
- Basing: Don't forget the base! Adding some texture (sand, flock, small rocks) and painting it can dramatically enhance the finished model.
And there you have it! From a digital file to a tangible, painted masterpiece. It's a journey, right? One that involves a bit of trial and error, a good dose of patience, and a whole lot of creative fun. I've been doing this for years now, both for my own collection and for customers through ArtOpia, and every single time I finish a miniature, it feels like I've brought a tiny piece of another world to life. Itâs an incredible feeling.
So, what are you waiting for? Grab an STL, fire up your slicer, and get that printer humming! The world of miniatures is vast and exciting, and I can't wait to see what tiny wonders you create. If you have any questions, or just want to share your latest print, drop a comment below. Happy printing, my friends!


