How to Create Custom Fonts and Text in 3D Modeling Software
This guide teaches you how to design and integrate your own custom fonts into 3D environments. Explore techniques for modeling unique text elements and applying them in popular 3D modeling software.

Unleashing Your Inner Font Designer: Crafting Custom Text for 3D Printing (and Boosting Your Business!)
Ever found yourself staring at a blank screen in your 3D modeling software, trying to find *just* the right font for that custom nameplate, trophy, or signage, only to realise nothing quite fits? Yeah, me too, like, a million times. It's that moment when you need something unique, something that screams "you" or perfectly captures a brand's essence, but all the standard fonts feel... well, standard. That's exactly where the magic of creating custom fonts and text comes in. And honestly, for a small 3D printing business like mine here in India, mastering this skill has been an absolute game-changer. It's not just about making cool stuff; it's about offering something truly bespoke, something your competitors might shy away from.
Why Go Custom? Because Standard is So Last Season!
Look, anyone with a basic FDM printer can download a model from Thingiverse and print it. But what sets you apart, especially in a bustling market like ours, is the ability to create unique, personalised items. Custom text isn't just a fancy add-on; it's often the core of a product. Think about it:
- Personalised gifts: Nameplates, keychains, birthday toppers.
- Business branding: Logos, shop signs, product labels.
- Event signage: Wedding decorations, exhibition stands.
- Educational aids: Custom alphabet blocks, braille texts.
And let's be real, customers are willing to pay a premium for that personal touch. A simple, well-designed custom nameplate, for example, might fetch anywhere from ₹400-₹800 depending on size, complexity, and filament used. But if you’re just slapping a generic Arial text onto a block, you’re missing out on the real artistic and financial potential. My business thrives on these unique orders, whether it’s a client asking for their company logo embossed on a model or a couple wanting their names intertwined in a decorative piece for their anniversary. That's the stuff that makes people go, "Wow, how did they do that?"
The Basic Approach: Extruding Built-in Fonts (and Why It's Often Not Enough)
Most 3D modeling software, be it Fusion 360, Tinkercad, Blender, or SolidWorks, has a text tool. It's usually straightforward: you select the tool, type your text, choose a font from your system's installed fonts, set the size, and then extrude it to give it thickness. It's fantastic for quick jobs – maybe a simple "HELLO WORLD" sign or a label for a storage box. For this, even a beginner-friendly tool like Tinkercad does a decent job with its "Text" shape. You drag it in, type, choose a basic font, and you're good to go. It’s free, it’s easy, and it’s where most people start.
But here's the deal: these fonts are often very basic. They're not designed for intricate 3D printing, and frankly, they can look a bit dull. You're limited to what's already on your computer, which might be fine for a quick prototype, but not for a premium custom product. Plus, some fonts can be tricky. If they have very thin lines or complex serifs, they might not extrude cleanly, or they might become unprintable with a standard 0.4mm nozzle. Trust me, I've had to tell clients "no, that cursive font will just turn into a blob on the printer" more times than I can count.
Stepping Up Your Game: Custom Shapes and Vector Magic
This is where the real fun begins, and where you truly start creating "custom fonts" – not just by picking a new typeface, but by designing the very letters themselves. The secret sauce often lies in leveraging vector graphics. Think of it like this: instead of picking a pre-made cookie cutter, you're designing your *own* cookie cutter from scratch. This method opens up a world of possibilities, from using your own handwriting to incorporating complex brand logos seamlessly into your 3D models.
My Go-To Tools (and some other great options)
- Fusion 360 (My Daily Driver): For me, Autodesk Fusion 360 is the sweet spot. It offers a free personal use license (which is amazing for small businesses or hobbyists who qualify) and has powerful sketching tools. You can sketch text, sure, but more importantly, you can import SVGs (Scalable Vector Graphics) and extrude them. The precision and control you get are just phenomenal. It’s got a bit of a learning curve, but it’s worth every single minute you invest.
- Blender: If you're looking for more artistic, sculptural text, or if you want to integrate your text into organic shapes, Blender is your friend. It's free and incredibly powerful for anything artistic. It can handle SVG imports too, and you can sculpt, deform, and texture your text in ways CAD software can't easily replicate.
- Inkscape / Adobe Illustrator (for the Vector Graphics): These are your partners in crime for creating the SVG files.
- Inkscape: Free and open-source. It's a fantastic vector editor. You can draw anything, convert raster images to vectors, and export perfect SVGs. This is what I often recommend to folks starting out who don't want to shell out for a subscription.
- Adobe Illustrator: The industry standard, but it's a paid subscription (Creative Cloud, which is a bit steep for some small Indian businesses, often starting around ₹1,600-₹4,500/month depending on the plan). If you're already in the Adobe ecosystem or need professional-grade vector work, it's brilliant.
The Workflow: From Idea to Printed Perfection
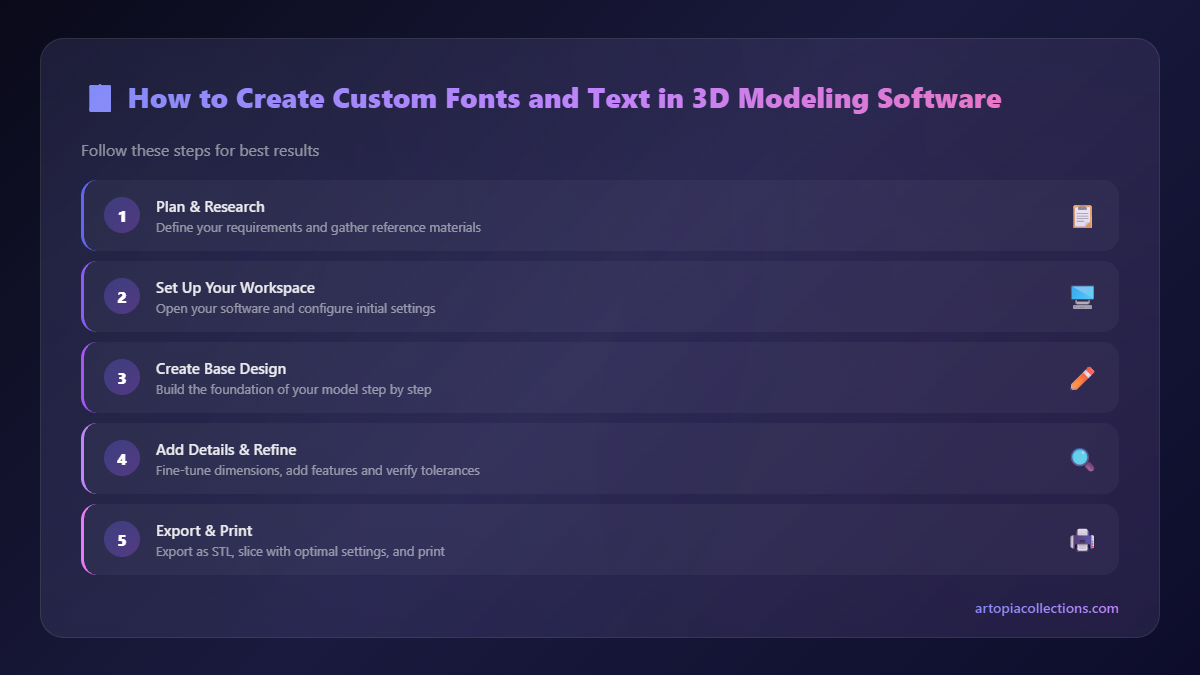
Let's break down the general process, focusing on the SVG import method, which is truly where the magic happens for custom text and logos.
Step 1: Design Your Text/Logo in a Vector Editor (Inkscape/Illustrator)
This is where your creativity shines.
- Choose or Create: You can either pick a unique font from a site like Dafont or Font Squirrel (make sure to check licenses for commercial use!) and type out your text. Or, you can truly go custom:
- Draw your own unique lettering.
- Digitize a client's handwritten signature.
- Convert a company logo (often provided as a JPG or PNG) into a vector format. Inkscape has a "Trace Bitmap" feature that works surprisingly well for this, though manual tracing gives the best results.
- Outline Text: This is CRUCIAL. If you just save text as an SVG, it might still be seen as editable text by your 3D software, not as shapes. In Illustrator, you select the text and go to Type > Create Outlines. In Inkscape, it's Path > Object to Path. This converts your letters into a series of interconnected lines and curves, making them actual shapes.
- Check for Gaps and Overlaps: Make sure all paths are closed and there are no stray lines or overlapping segments. Use the "Pathfinder" tool in Illustrator or "Boolean operations" in Inkscape to unite overlapping shapes, especially if you have fancy ligatures or complex letter interactions. Unclosed paths will give you headaches when you try to extrude them.
- Save as SVG: Export your design as an SVG file. Keep it clean and simple for easier import into 3D software.
Step 2: Import and Extrude in Your 3D Modeling Software (Fusion 360 Example)
Now, bring your beautiful vector design into the third dimension!
- Create a New Design & Sketch: Start a new design and create a sketch on the plane where you want your text to appear.
- Insert SVG: Go to Insert > Insert SVG. Select your SVG file.
- Position and Scale: The SVG will appear. You might need to move it, rotate it, and scale it to the correct size. Make sure it's accurately placed on your part.
- Extrude! Once the SVG is inserted into the sketch, you'll see the profiles of your letters. Now you can use the Extrude tool. Select the profiles you want to extrude (the letters, or the spaces *around* the letters if you want debossed text). You can extrude them up (emboss) or down (deboss) into your model. Set the desired thickness.
- Refine (Optional but Recommended):
- Fillets/Chamfers: Sharp edges can be brittle and uncomfortable. Adding small fillets (rounded edges) or chamfers (angled edges) to your text makes it look more professional, feel nicer, and often print better. This is especially true for text that will be handled frequently, like on a keychain.
- Combine: If you're adding text to an existing body, make sure the extrusion operation is set to "Join" to fuse the text with the main body.
And that’s it! You've gone from a flat vector image to a fully 3D printable piece of custom text. The possibilities are truly endless once you grasp this technique.
Practical Tips & Troubleshooting from My Workshop
- Kerning and Spacing: Don't underestimate the power of good spacing. Bad kerning (the space between individual letters) can make even the most beautiful font look amateurish. Adjust it carefully in your vector editor before exporting the SVG. This makes a huge difference in readability and aesthetic appeal, especially for smaller prints.
- Minimum Feature Size: Your printer nozzle has limits! For a standard 0.4mm nozzle, try to keep your text lines at least 0.8mm-1mm thick (or even more if it's structural) to ensure they print cleanly and don't break off easily. Any thinner, and you're just asking for trouble, stringing, or parts that peel off the bed.
- Overhangs: If your font has intricate flourishes or large overhangs (like a fancy capital 'T' or a 'J'), consider how it will print. You might need supports, which can sometimes leave marks on the text surface. Design smart to minimise these.
- Multi-Color Text: Want to make your text pop with a different color? For FDM printers, you can often do a manual filament change mid-print. Design your model so the text starts at a specific layer height, print the base, pause, swap filament, and continue. It takes practice, but the results are stunning. I often do this for clients wanting their logo in brand colors.
- Pricing Your Work: For custom text jobs, I usually charge for two main components: design time (based on complexity, often ₹500-₹2000 for a moderately complex logo/text setup) and print time + material (which varies greatly but a good rule of thumb is ₹10-₹20 per gram of finished print for PLA, depending on post-processing and exclusivity). A simple nameplate is usually ₹300-₹800, but a complex, multi-color logo sign could easily climb to ₹2000-₹5000 just for the print, not including the design work.
Filaments and Printers I Rely On (Available in India!)
For custom text, especially if it's detailed, good filament and a well-tuned printer are non-negotiable.
- Filaments:
- PLA: My absolute go-to for most custom text. It's easy to print, comes in a rainbow of colors, and the details come out sharp. I usually stock eSUN PLA+, Overture PLA, or even some of the local brands like 3DMart and Protopasta (if you can find it easily – it’s a bit premium). A good 1kg spool of eSUN PLA+ will set you back around ₹1400-₹1800 on Amazon.in. Check out eSUN PLA+ on Amazon.in here!
- PETG: For text that needs a bit more durability or resistance to higher temperatures (like an outdoor sign), PETG is fantastic. It’s slightly harder to print than PLA but worth the effort.
- Printers:
- Creality Ender Series: For beginners or small businesses on a budget, an Ender 3 (like the V2 Neo or even the latest V3 KE) is a workhorse. You can get crisp details once it’s properly calibrated. The Ender 3 V3 KE, for example, offers good speed and decent build volume for around ₹25,000-₹30,000.
- Anycubic Kobra Series: Similar to Ender, Anycubic offers great value. My Kobra 2 Neo consistently produces excellent results for text-heavy prints.
- Bambu Lab: If you're looking to scale up and have a bigger budget (think ₹60,000+ for a P1P or A1 Mini), Bambu Lab printers offer incredible speed and reliability, which means faster turnaround for custom orders. I'm personally saving up for one of these bad boys! Find the Creality Ender 3 V3 KE on Amazon.in!
Ready to Create Your Own Typographic Masterpieces?
Mastering custom text design in 3D printing isn't just a cool trick; it's a vital skill for anyone serious about pushing the boundaries of what they can create, especially if you're running a business. It allows you to offer truly unique products, stand out from the crowd, and charge what your bespoke designs are actually worth. It might seem daunting at first, playing around with vector software and 3D modeling, but once you get the hang of it, you'll wonder how you ever managed without it. Start simple, experiment, and don't be afraid to try out different fonts and styles. The satisfaction of seeing your own unique lettering come to life layer by layer on the print bed is incredibly rewarding.
And hey, if you're looking for some inspiration or even ready-to-print designs, don't forget to check out what we've got brewing over at Artopia Collections. We're always adding new stuff, often incorporating these very custom text techniques!
Happy printing, my friends! Go make some amazing, unique stuff!