Creality Sonic Pad Setup: Adding a Touchscreen to Your Ender 3
Transform your Ender 3 into a modern, high-performance printer by adding the Creality Sonic Pad. This guide walks you through the complete setup, from installation to configuring Klipper firmware.

Okay, let me tell you, if you've been running an Ender 3 for a while, you know the drill. You love it because it's a workhorse, a total champion for its price point – honestly, what other printer gives you so much bang for your buck, right? But deep down, you also know its limitations. That stock screen, the not-so-blazing-fast print speeds, the occasional ghosting on your beautiful prints... it’s all part of the Ender 3 charm, or so we tell ourselves. Well, I’m here to tell you that it doesn’t have to be that way anymore. Not after I got my hands on the Creality Sonic Pad and hooked it up to my trusty Ender 3. My friends, it’s like giving your reliable old Maruti 800 a brand new turbocharged engine and a touchscreen infotainment system. Seriously, the difference is night and day.
My Ender 3, My Business, and The Quest for Speed (and Sanity)
I started ArtOpiA Collections, my little 3D printing business, right here in India, fuelled by my passion for making cool stuff. And guess what? My Ender 3 Pro and later an Ender 3 V2 have been the backbone of it all. I print everything from custom prototypes for local businesses to fun figurines and functional parts. The thing is, as the orders started picking up, I found myself constantly staring at the estimated print times, wishing my printers could just... go faster. I mean, you can only push the stock firmware so much before your prints start looking like they were done in a hurry, full of wobbles and artifacts. I was constantly battling stringing, ringing, and trying to find that elusive sweet spot between speed and quality, usually settling for painfully slow speeds to get decent results.
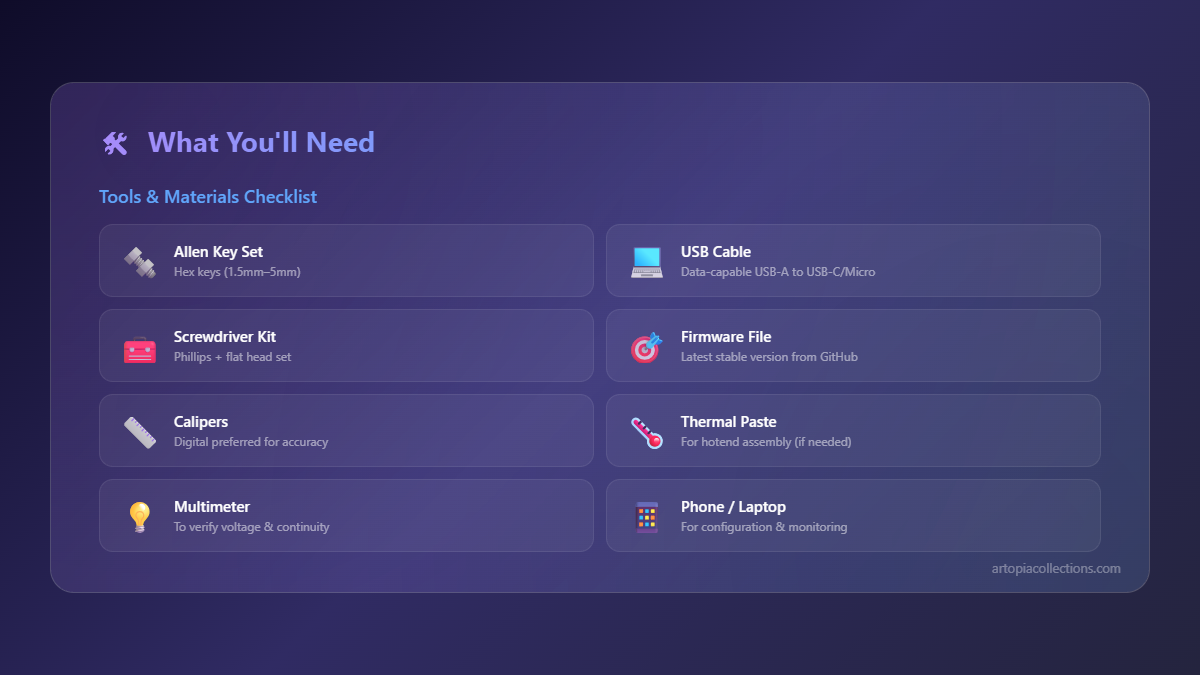
I'd heard whispers, of course, about Klipper firmware. Everyone online was raving about it – faster speeds, better quality, remote control, and all sorts of fancy calibrations that just weren't possible with Marlin. But honestly, the thought of tinkering with Raspberry Pis, command lines, and flashing custom firmware felt a bit intimidating. I'm a maker, not a full-time software engineer, you know? I wanted the benefits of Klipper without the headache of setting up a whole new mini-computer. And that, my friends, is exactly where the Creality Sonic Pad comes into the picture. It promises to be a ready-made, plug-and-play solution for Klipper, essentially a dedicated Klipper host with a gorgeous touchscreen, all neatly packaged. It retails for about ₹15,000 to ₹18,000 here in India, which, I'm not gonna lie, is a significant investment, especially when you consider an Ender 3 itself can be found for around ₹18,000-₹25,000 nowadays depending on the model and where you get it. But was it worth it? Oh, absolutely. Let me tell you why.
Unboxing the Magic: First Impressions
When the Sonic Pad arrived, the packaging was, as expected from Creality, pretty solid. You open it up, and there it is: a sleek, black tablet-like device with a generous 7-inch touchscreen. It feels premium, not like some cheap accessory. In the box, you get the Sonic Pad itself, a power adapter (with Indian plug, thankfully!), a USB cable (Type-A to Micro-B, standard for many printer mainboards), an accelerometer sensor (more on this later, it's a game-changer!), and a user manual that actually makes sense. And you also get a couple of USB drives, one for flashing firmware, and another for storage, which is a nice touch.
The build quality of the Sonic Pad itself is quite good. It’s got some heft to it, and the screen is vibrant and responsive. Look, it’s not an iPad, obviously, but for a dedicated 3D printing device, it’s more than adequate. The ports are all neatly laid out on the back: four USB-A ports, an Ethernet port, and the power input. It’s designed to be a central hub, and it definitely looks the part.
Setting It Up: Less Scary Than You Think!
Alright, so this is where some people might get a bit nervous. Klipper, flashing firmware, all that jargon. But honestly, Creality has made it incredibly user-friendly, even for someone who, like me, prefers making things with plastic over typing lines of code. Here’s the deal:
1. Physical Connections: The Easy Bit
First, I set the Sonic Pad next to my Ender 3. You really just need to plug it into power. Then, connect one of the USB-A ports on the Sonic Pad to the Micro-B (or Type-B, depending on your Ender 3 model) port on your Ender 3’s mainboard. Make sure your printer is also powered on, obviously. That's it for the physical connections! Simple, right?
2. Powering On and Wi-Fi Setup: Standard Stuff
Once you power on the Sonic Pad, it boots up pretty quickly. The initial setup wizard guides you through choosing your language, agreeing to terms (boring, but necessary), and then connecting to your Wi-Fi network. This step is crucial because Klipper thrives on network connectivity – that's how you get remote access, the web interface, and all that goodness.
3. Flashing Klipper Firmware: Don't Panic!
This is where the magic really starts. The Sonic Pad needs to communicate with your Ender 3 using Klipper firmware, not the stock Marlin. But Creality has made this incredibly easy. The Sonic Pad asks you which printer model you have (it supports a ton of Creality printers, and even others if you're adventurous!). I selected my Ender 3 V2. Then, it literally tells you to insert the provided USB drive into the Sonic Pad. It automatically copies the correct Klipper firmware file onto it. Then you take that USB drive, plug it into your Ender 3's mainboard (where your SD card usually goes), and power cycle the printer. The Ender 3's screen might stay blank, or show a Creality logo – don't worry, that means it's flashing. After a minute or two, you power cycle it again, remove the USB drive, and then the Ender 3 is running Klipper! And guess what? The Sonic Pad automatically detects it when you reconnect the USB cable.
It's genuinely a few button presses on the Sonic Pad, and it does all the heavy lifting. Way easier than compiling firmware on your PC, I promise.
4. Initial Configuration: Fine-Tuning Your Printer
Once the Sonic Pad detects your Ender 3, it asks a few more questions about your specific setup – things like whether you have a BLTouch/CRTouch, the nozzle diameter, and so on. It loads a pre-configured printer.cfg file, which is basically the Klipper configuration file, tailored for your specific Ender 3 model. This is super helpful because setting up a printer.cfg from scratch can be a bit daunting for beginners.
Then, the Sonic Pad walks you through some essential initial calibrations:
- Motor Direction Test: Just to make sure X, Y, Z axes move in the correct direction.
- Endstop Test: To ensure your limit switches are working.
- PID Tuning: For your hotend and heated bed. This makes sure your temperatures are stable and accurate.
- Bed Mesh Leveling (if you have ABL): If you have a BLTouch or CRTouch (which I highly recommend for any Ender 3, it just saves so much hassle!), the Sonic Pad will use it to create a detailed map of your bed's surface. This compensates for any unevenness, giving you perfect first layers every time.
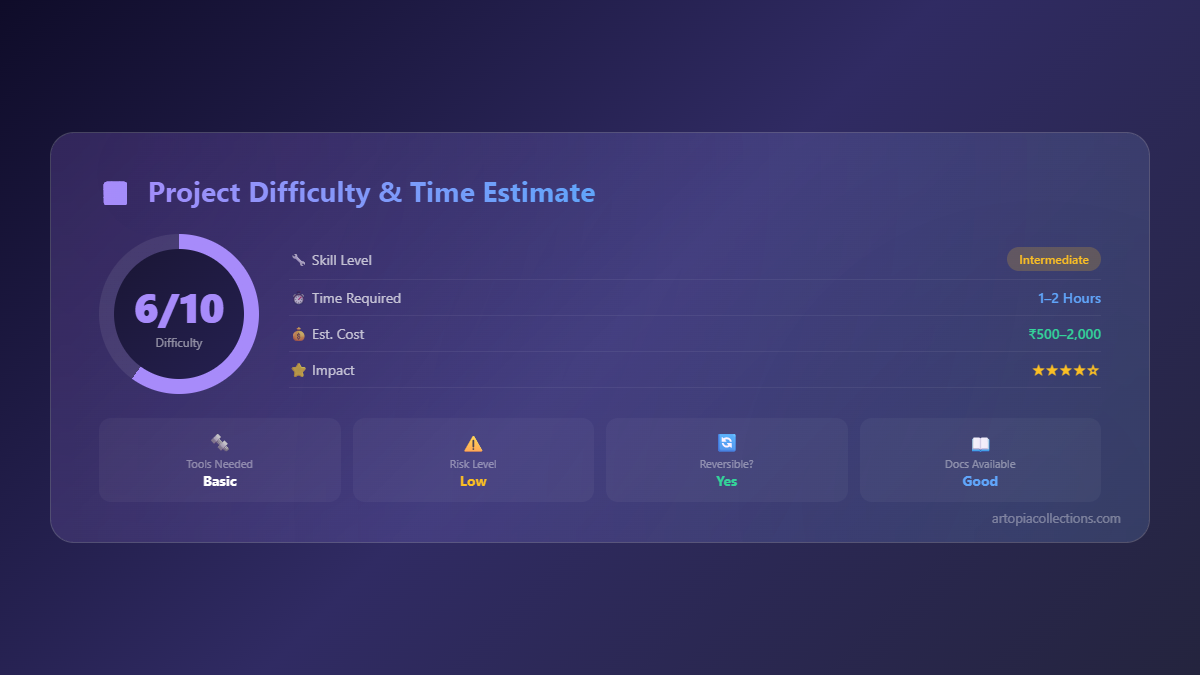
And then, boom! You're ready to print. Seriously, within an hour (maybe a bit more if you're taking your time, or like me, pausing for chai), I had Klipper up and running on my Ender 3 V2. It was surprisingly painless.
The Real Game-Changer: Input Shaping!
Okay, so Klipper gives you speed. But how does it do it without turning your prints into a wobbly mess? That's where Input Shaping comes in, and the Sonic Pad makes it almost ridiculously easy. Remember that little accelerometer sensor I mentioned earlier? You attach it to your print head (the Sonic Pad even has specific mounts you can print for popular printers!), plug it into the Sonic Pad, and then, from the touchscreen, you just hit "Start Input Shaping Calibration."
What happens next is pretty cool: your printer’s X and Y axes start moving rapidly, making weird vibrating noises. The accelerometer measures the resonances (vibrations) of your printer at different speeds. Once it's done, Klipper uses this data to apply specific "input shaper" algorithms that cancel out those vibrations. The result? You can print at much, much higher speeds without getting ghosting, ringing, or salmon skin artifacts on your prints. Honestly, it’s magic. My Ender 3 V2, which used to struggle with quality above 60-80mm/s, now consistently produces excellent prints at 100-120mm/s, and even bursts up to 150mm/s for infill. That’s double the speed for similar or even better quality! Think about how much time that saves, especially when you're running a business and need to churn out parts.
And that’s not all. You also get easy access to the web interface (either Mainsail or Fluidd, which are bundled with Klipper). Just type the Sonic Pad's IP address into your browser, and you get a beautiful, full-featured dashboard where you can control every aspect of your printer, upload G-code, monitor prints with a webcam (if you connect one), and even edit your printer.cfg file on the fly. It's truly liberating to be able to start a print from my phone while I'm out getting some quality PLA filament from the market.
My Experience: A Printer Reborn!
Since setting up the Sonic Pad, my Ender 3 V2 feels like a completely different machine. The print speeds are phenomenal, saving me hours on larger prints. The quality, thanks to input shaping and precise calibrations, is consistently excellent. First layers are perfect, bridging is cleaner, and overall part strength seems better because the layers are laid down more consistently.
The touchscreen itself is a joy to use. It’s intuitive, responsive, and gives you quick access to all the critical controls. You can start prints from a USB drive plugged into the pad, monitor progress, adjust temperatures, fan speeds, and even execute macros (custom commands you can set up in Klipper). It completely replaces the need for the stock Ender 3 screen, and it does it with so much more functionality and elegance.
I personally think that if you're serious about 3D printing, especially if you're running a small business like ArtOpiA Collections, the Sonic Pad is an invaluable tool. It truly unlocks the full potential of your Ender 3. No more feeling jealous of those speedy CoreXY printers! You can confidently print with high-quality filaments from brands like eSun, Overture, or even some of the great Indian brands available, and know that your Ender 3 can handle it with speed and precision.
Is there a downside? Well, the initial cost is definitely a factor for many hobbyists. As I mentioned, it's roughly the cost of another budget printer. But for me, the time saved and the quality improvement directly translate to more efficient production for my business, which makes the investment totally worth it. And yes, while the setup is streamlined, it still involves some fundamental changes to your printer’s firmware, which might seem a bit much for an absolute beginner who just wants to press 'print'. But trust me, it’s not as daunting as it sounds, especially with Creality’s guidance.
Another minor thing is that while the Sonic Pad is a dedicated Klipper host, it’s still a closed ecosystem from Creality. You can't just install whatever you want on it like you could with a Raspberry Pi. But for most users, that's actually a benefit – less tinkering, more printing. For everyday maintenance and smaller prints, you might want some essential 3D printer tools to keep your machine in top shape.
Final Thoughts: Transform Your Ender 3!
If you've been on the fence about Klipper, or if you're an Ender 3 owner wishing for more speed and quality, the Creality Sonic Pad is, in my honest opinion, a no-brainer. It takes all the complexity out of setting up Klipper and delivers an incredibly powerful and user-friendly experience right to your fingertips. It transforms your Ender 3 from a good budget printer into a seriously competitive machine capable of challenging printers many times its price.
For ArtOpiA Collections, it has truly been a game-changer. I can fulfill orders faster, offer better quality products, and spend less time tweaking and more time designing and creating new pieces for my customers. It’s an investment that pays for itself in time, quality, and sheer joy of printing.
So, go on, take the plunge! Give your Ender 3 the upgrade it deserves. And if you’re looking for some cool, unique 3D printed items, or just want to see what kind of quality an Ender 3 with a Sonic Pad can achieve, do check out my work at ArtOpiA Collections. We’re always pushing the boundaries of what’s possible with these amazing machines!