Creality K1 Speed Tuning: How to Safely Push Past 600mm/s
This guide dives deep into advanced speed tuning for your Creality K1, showing you how to safely push its print capabilities beyond 600mm/s. Learn the essential steps to optimize your K1's performance and achieve blazing fast, high-quality prints.

Creality K1 Speed Tuning: How to Safely Push Past 600mm/s Without Losing Your Mind (or Your Prints!)
Okay, K1 owners, let's be honest. That 600mm/s number on the box? It's like a siren song, isn't it? You unbox the beast, hit print, and... well, it's fast, sure. But then you start seeing the Bambu P1Ps and X1Cs blasting past, and that little voice in your head, the one that whispers 'faster, faster,' gets louder. For me, running a small 3D printing business here in India, speed isn't just a bragging right; it's literally money saved, more orders fulfilled, and happier customers. So, naturally, I had to see if my K1 could really go toe-to-toe, or even surpass, those speeds while keeping the quality crisp enough for my picky clients. And trust me, it’s a journey, not a sprint. But oh, what a journey!
Before we dive deep, let's get one thing straight: pushing past 600mm/s on your Creality K1 isn't about just blindly changing a number in your slicer. If you do that, you'll end up with spaghetti, layer shifts, ghosting, and probably a few choice words muttered under your breath. This is about understanding what makes a printer fast, reliable, and consistent, even when it's moving like a blur. It's a combination of hardware tweaks, software magic, and a whole lot of patience. And yes, you absolutely *can* get fantastic results even at speeds that would make most other printers tremble.
Why Even Bother with Ludicrous Speed? My Business Needs Demand It!
You see, here at Artopia Collections, we pride ourselves on delivering unique, high-quality 3D printed items. From intricate prototypes to decorative pieces, our clients expect the best. But in a competitive market, especially with the rise of lightning-fast alternatives, lead times matter. A print job that takes 10 hours on a 'normal' printer might take 3-4 hours on a properly tuned K1, or even less if it's a simple, robust part. That's not just cutting my electricity bill (which, let's be real, is a significant cost in India), it means I can take on more orders, deliver faster, and keep my customers smiling. It also frees up my time to focus on new designs, like the ones you can see on our Artipia Collections product page.
I started with basic FDM printers, you know, the Ender 3 style workhorses. They were great for learning, but when the K1 came along with its CoreXY kinematics and enclosed build chamber, it felt like a significant leap. It promised speed out of the box, and it delivered... mostly. But I quickly realized that 'out of the box' speed isn't 'optimal' speed. And optimal is what we're chasing here.
The K1: A Raw Gem That Needs Polishing
The Creality K1 is, in my opinion, a seriously underrated machine. It's got the hardware for high speed – CoreXY, a robust frame, powerful motors, a good hotend for flow. But Creality's initial firmware (and sometimes even the current stock one) kinda held it back. It's like having a Ferrari with an electronic limiter that won't let you push past 150 km/h. Frustrating, right?
Here's the deal: to truly unleash the K1, you need to step beyond Creality's comfort zone. And for that, we're talking Klipper. If you haven't rooted your K1 yet and installed Klipper, that's literally step zero. It gives you the granular control you need over every single aspect of your printer's motion and extrusion. Without it, you're basically guessing. Look, there are tons of tutorials out there on how to root the K1 and install Klipper; it's not as scary as it sounds, I promise. Just take your time with it.
Prerequisites: Don't Even Think About Speed Without These!
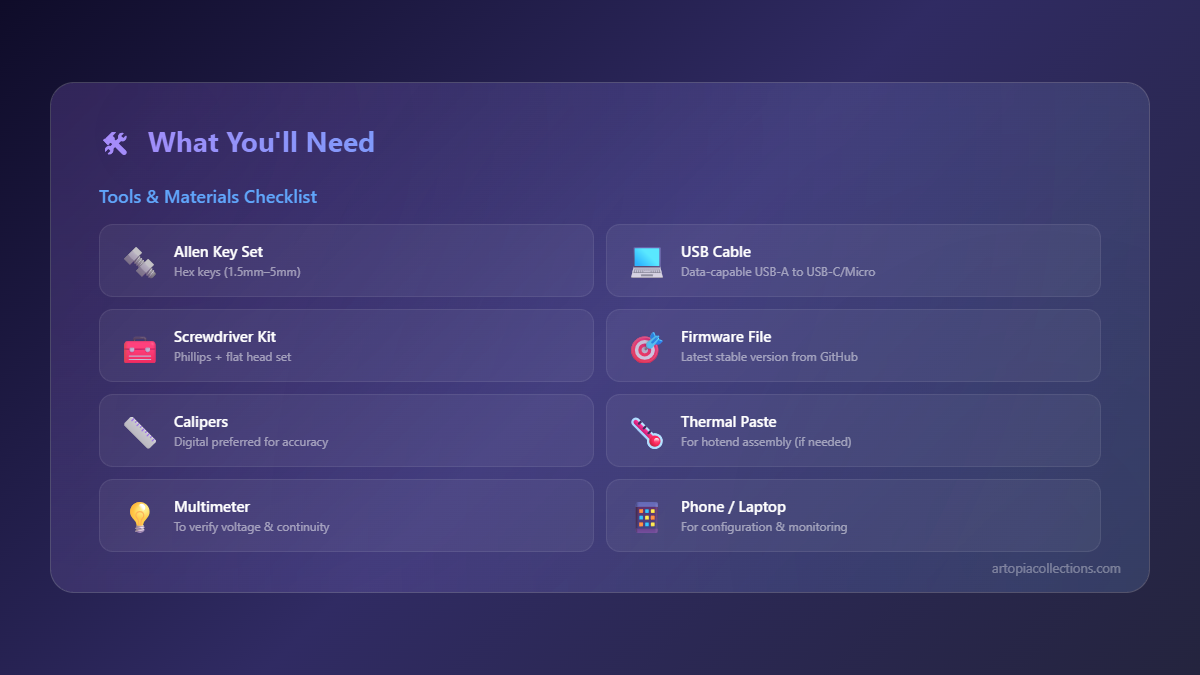
Before you even dream of hitting those insane speeds, you need to ensure your foundation is rock solid. Skip these at your peril; you'll just be chasing your tail.
- Klipper Firmware: As I said, absolute non-negotiable. This is your key to advanced tuning like Input Shaper and Pressure Advance.
- Mechanical Check-Up:
- Belts: Are they properly tensioned? Not too tight, not too loose. A good 'twang' sound is what you're after. Loose belts lead to ghosting and dimensional inaccuracy.
- Gantry: Is it square? Are all screws tight? Any wobble or play will be amplified at high speeds.
- Nozzle: Check for wear. A worn nozzle drastically affects print quality and consistency, especially with abrasive filaments. Consider upgrading to a hardened steel or CHT nozzle if you're serious. More on that later.
- Bed Leveling/Tramming: A perfectly level bed is critical for the first layer, which is the foundation of your print.
- Filament Choice: Not all filaments are created equal for speed. Generic PLA will struggle. You need good quality, consistent filament. I personally prefer eSUN PLA+ or Overture PLA Professional. They just flow better and handle the heat. Local Indian brands like D3D or 3Ding also have some great options, but make sure they're consistent.
The Holy Trinity of Speed Tuning: Input Shaper, Pressure Advance, and Flow Rate
These three are the heart of getting quality prints at high speed. You absolutely cannot skip them.
1. Input Shaper (IS) Calibration: Killing the Ghost
Input Shaper is basically what tells your printer how to compensate for vibrations and resonance. Without it, when your print head changes direction rapidly, the momentum causes the printer frame to flex and vibrate, leaving ghosting or ringing artifacts on your print. At 600mm/s and beyond, this would be catastrophic.
Your K1 has an accelerometer built-in, which makes this relatively straightforward. Klipper has excellent guides for running the calibration. You'll run tests that make your print head shimmy and shake, then Klipper analyzes the data and applies filters to counteract those vibrations. It's pure magic. After calibration, you'll notice a dramatic reduction in ringing, allowing you to push acceleration much higher.
My tip: Don't just run it once. If you move your printer, or even if you just feel like it, run it again. It takes maybe 10-15 minutes, but the results are worth it every single time.
2. Pressure Advance (PA) Calibration: Taming the Corners
Think of Pressure Advance as your printer's ability to predict and compensate for pressure buildup in the hotend. When your printer slows down for a corner, plastic keeps extruding due to residual pressure, leading to blobs. When it speeds up again, there's a delay before full pressure builds, leading to underextrusion. PA solves this by reducing extrusion before a slowdown and increasing it before a speed-up.
Klipper makes PA calibration pretty easy with dedicated test prints. You print a line of walls or a specific pattern, and as the print progresses, the PA value changes. You then inspect the corners and lines, find the setting where they look cleanest, and input that into your printer. It's a game-changer for sharp, clean corners and consistent line widths, especially with high flow rates.
3. Flow Rate / Extrusion Multiplier Calibration: The Goldilocks Zone
This is basic, but critical. If your printer extrudes too much or too little plastic, all other settings are meaningless. Your slicer tells the printer to extrude a certain amount, but due to filament diameter variations, hotend resistance, etc., the actual output might be different. Calibrate your e-steps (if you haven't already done it when setting up Klipper) and then calibrate your flow rate for each filament.
I usually do this by printing a single-wall cube (no top or bottom layers) with 0.4mm line width (or whatever nozzle size you have). Then, measure the actual wall thickness with calipers. Adjust your flow rate in the slicer until the measured thickness matches your desired line width. Simple, but utterly essential for dimensional accuracy and strong prints.
Advanced Tuning: Going Beyond 600mm/s
Once your Klipper configuration is dialled in with IS, PA, and flow, you can start pushing the envelope in your slicer. I personally use OrcaSlicer (a fork of PrusaSlicer/SuperSlicer) because its calibration tools and control over every parameter are just fantastic. PrusaSlicer is also excellent. Stay away from Creality Print if you're serious about this level of tuning.
1. Slicer Speed Settings: Increment, Don't Leap!
Start by incrementally increasing your speeds. Don't jump from 300 to 800mm/s. Try 500mm/s, then 600, then 700. Pay close attention to:
- Outer Wall Speed: Keep this a bit lower than your inner walls for surface finish. Maybe 150-250mm/s for quality.
- Inner Wall Speed: Here's where you can crank it up. 300-600mm/s is a good starting range for pushing.
- Infill Speed: This is where you can go absolutely bonkers. 600mm/s, 700mm/s, even 800mm/s for infill is often achievable without affecting surface quality much.
- Travel Speed: This should always be maxed out (within reason of your K1's mechanics). 600-800mm/s is generally safe.
2. Acceleration Values: The Real Speed Demon
This is often more impactful than pure speed. A printer that accelerates and decelerates quickly will finish prints faster, even if its top speed is slightly lower. After a proper Input Shaper calibration, you can safely increase your acceleration values. Start with 8,000-10,000 mm/s². I've personally pushed my K1 to 15,000-20,000 mm/s² for infill and even perimeters on some prints, and it handles it beautifully. But experiment and check your results! Look for any signs of ghosting returning.
3. Temperature Tuning: Hotter for Flow!
To push plastic through your nozzle at extreme speeds, you need more heat to make it less viscous. For PLA, I usually print at 200-210°C at 'normal' speeds. For 600mm/s and above, I'll often bump it up to 220-230°C. For PETG, you might go from 230-240°C to 250-260°C. Always do a temperature tower for each new filament to find its sweet spot for your desired speed.
4. Layer Height vs. Speed: Find Your Balance
Thinner layers mean less plastic per layer, meaning your hotend can handle higher linear speeds. Thicker layers mean more plastic, so you might need to dial back the speed slightly or really push the temperature. For crazy speeds, I often stick to 0.2mm layer height for a good balance of speed and quality. For quick drafts, I might go 0.28mm or 0.3mm and accept a slight drop in speed or quality.
Hardware Upgrades for the Truly Obsessed (Like Me!)
While the K1 is great, a few select upgrades can really unlock its full potential for extreme speed.
1. High-Flow Nozzle: The Ultimate Gateway
This is probably the single best upgrade for achieving ridiculous speeds with quality. Standard brass nozzles are fine, but a CHT (Core Heating Technology) nozzle, or a similar high-flow design like those from ObXidian or Phaetus, dramatically increases the volumetric flow rate. They achieve this by increasing the surface area for heat transfer to the filament inside the nozzle. I've found that a good CHT nozzle, which costs about ₹800-₹1,500 on Amazon.in, can practically double your usable flow rate. This means you can either print much faster at the same temperature or print at lower temperatures for better detail at high speeds. I can't recommend this enough. You can find various CHT nozzles suitable for K1 here.
2. Filament Dryer: An Absolute Must in India!
Okay, this isn't directly a "speed" upgrade, but it's crucial for consistent quality at speed, especially in our humid Indian climate. Wet filament bubbles, spits, and causes inconsistent extrusion, leading to weak layers and ugly prints. You simply can't push high speeds with wet filament. A good filament dryer can cost anywhere from ₹3,000 to ₹6,000. It's an investment that pays for itself in saved failed prints and better quality. Check out some options for filament dryers on Amazon.in.
3. Part Cooling: Bridging the Gap
At very high speeds, especially with PLA, your layers don't have enough time to cool before the next layer is deposited. This can lead to warping, sagging, and a loss of detail. The K1's cooling is pretty decent, but sometimes it's not enough. Ensure your part cooling fans are running at 100% (or near it) for fast PLA prints. For PETG, you'll want to dial it back to 20-50% to maintain layer adhesion. Some people even upgrade to more powerful cooling fan setups, but I've found the stock K1 cooling to be sufficient for most high-speed PLA applications once other variables are dialed in.
Real-World Impact and My Business
All this tuning isn't just for fun; it has a tangible impact on my business. Take, for example, a complex architectural model for a client. Before tuning, it might have been a 15-hour print, pushing my delivery schedule. Now, I can often knock that down to 6-8 hours with excellent quality. That's nearly halving the print time! It means I can take on more projects, meet tighter deadlines, and ultimately, grow Artopia Collections. We make everything from custom lithophanes to functional prototypes, and every minute saved translates directly to productivity.
It’s also about the peace of mind. Knowing my K1 can handle these speeds reliably means I can start a print, walk away, and trust that it won't be a tangled mess when I return. That kind of reliability is priceless when you're managing multiple orders.
A Few Words of Caution (Because I've Been There!)
- You WILL Fail: Let's be real, pushing the limits means you'll have failed prints. Don't get discouraged. Each failure is a learning opportunity. Analyze what went wrong, tweak a setting, and try again.
- Don't Copy Settings Blindly: My settings might not work perfectly for your K1. Every printer is slightly different. Use my advice as a starting point, but always calibrate and test for YOUR machine and YOUR filament.
- Safety First: You're dealing with moving parts and high temperatures. Be careful. Keep your hands clear. And definitely don't leave experimental, super-fast prints unattended for long periods until you're confident in your settings.
- Warranty: Rooting your K1 and making hardware modifications might void your warranty. Be aware of the risks. For me, the gains were worth it.
The Journey Continues...
Pushing your Creality K1 past 600mm/s isn't a one-time job; it's an ongoing journey of refinement. New filaments come out, new Klipper features appear, and your printer itself changes over time. Always be calibrating, always be learning. The K1 is a phenomenal machine with incredible potential, and with a bit of love and a lot of tuning, it can truly stand shoulder-to-shoulder with (and often surpass) printers costing twice as much.
So, go forth, tinker, calibrate, and enjoy the thrill of watching your K1 absolutely fly! Happy printing, my friends!


