Body Scanning for Custom Orthotics and Insoles: A DIY Approach
Ever wondered if you could make your own custom orthotics or insoles? This guide shows you how to use simple body scanning methods to achieve a perfect, personalized fit right from your home.

No More Aches, Only Arches: My DIY 3D Printed Orthotics Adventure!
Oh man, let me tell you, there's nothing quite like the feeling of standing on your feet all day, hustling at the workshop, packing orders, and then just wanting to saw your legs off by evening. Sound familiar? For years, I just dealt with it. Generic insoles from the local medical store? They felt okay for a bit, but never truly *solved* anything. And custom orthotics from a specialist? Let's just say my wallet started sweating just thinking about the price tag here in India. But then, a thought hit me, like a lightning bolt fueled by hot glue and stepper motors: I run a 3D printing business! Why am I not using this superpower for my own aching feet? That, my friends, is how my deep dive into DIY body scanning for custom 3D printed orthotics and insoles began, and honestly, it’s been a game-changer.
Look, we all know our feet are unique. They're not just some standard size 7 or 10. They have their own quirks – flat arches, high arches, bunions, heel spurs, pronation, supination... the whole shebang. A one-size-fits-all insole just can't cater to those specific needs. It's like trying to put a square peg in a round hole, or maybe more accurately, a generic, flat rubber slab under a uniquely curved, biomechanically complex foot. It just doesn't work optimally. And that's where the magic of 3D printing, combined with a bit of DIY ingenuity, really shines. Imagine an insole perfectly molded to *your* foot's contours, supporting *your* arch exactly where it needs it, cushioning *your* heel just right. It's not just a dream; it's totally doable, and guess what? You don't need to be a podiatrist or a CAD guru to get started.
The Problem with Generic – And the Promise of Personalisation
I mean, how many times have you bought those gel insoles for ₹500-₹1000, hoping they'd fix everything? They might feel squishy initially, but after a few weeks, they compress, lose their support, and you're back to square one. The thing is, they're designed for the "average" foot, which honestly, doesn't really exist. Every foot is an individual masterpiece of bones, ligaments, and tendons. And when you're on your feet all day, especially in a workshop environment like mine, those tiny misalignments can lead to knee pain, back pain, and even headaches. It's all connected, you know? The ground-up support system is crucial.
The alternative, professional custom orthotics, can range from ₹5,000 to ₹15,000 or even more, depending on where you go and the materials used. And while they're fantastic, that's a significant investment, especially if you need multiple pairs for different shoes, or if your feet change over time. My approach? Let's harness the power of desktop 3D printing to create something incredibly effective, highly custom, and astonishingly affordable. Plus, there's that immense satisfaction of making something perfectly tailored for yourself.
Step 1: Capturing Your Foot – The DIY Scanning Saga
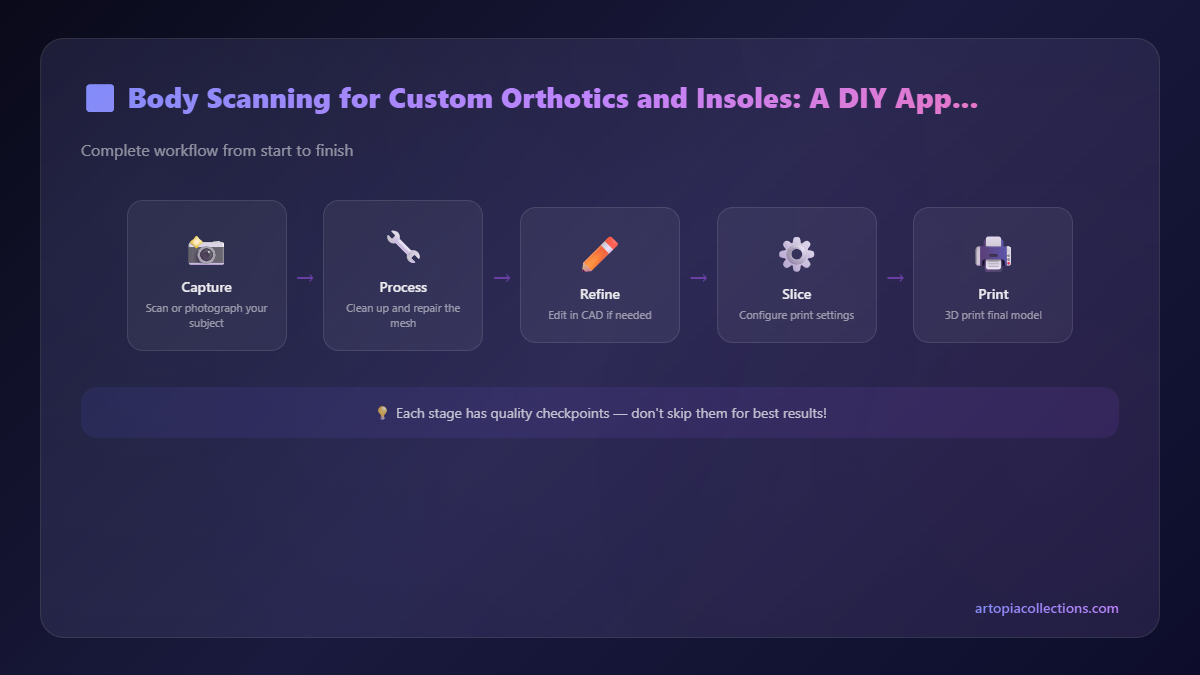
Alright, so how do you get your foot's exact shape into a digital file? This is where the "scanning" part comes in, and honestly, it's easier than you might think. You've got a few options, ranging from super simple to a bit more involved.
Option A: Smartphone Photogrammetry (Budget-Friendly Wizardry)
This is probably the most accessible way to start. You basically take a ton of photos of your foot from all angles, and then special software stitches them together to create a 3D model. Sounds complex, right? But apps like KIRI Engine or Polycam have made it incredibly user-friendly. You just need good lighting, a steady hand (or a friend to help), and a plain background. I've used this method quite a bit for smaller objects for my ArtOpia Collections, and it works surprisingly well for organic shapes like feet. The trick is to get your foot in a non-weight-bearing position (or partially weight-bearing, depending on the desired arch support) and ensure you capture every curve and contour. The accuracy might not be medical-grade, but for a custom insole, it's usually more than sufficient. Plus, most of these apps have a free tier or a very affordable subscription.
Option B: Dedicated 3D Scanners (Level Up Your Precision)
If you're serious about this, or you plan on doing more scanning for other projects (which, if you're a 3D printing enthusiast, you probably will!), a dedicated handheld 3D scanner is a fantastic investment. I personally use a Creality CR-Scan Lizard for some of my more intricate projects, and it's brilliant for capturing fine details. There are also great options like the Revopoint POP series. These scanners typically connect to your laptop, and you just wave them around the object. The software builds the model in real-time. The learning curve is a bit steeper than a phone app, but the results are far more accurate and cleaner. You can find options like the Creality CR-Scan Lizard for around ₹50,000 - ₹70,000, or some Revopoint models start slightly lower. It's an investment, sure, but if you're thinking about offering custom services, it's totally worth it. Check out options for handheld 3D scanners on Amazon – they often have great deals: Handheld 3D Scanners on Amazon.in.
One critical thing to remember, whether you're using your phone or a dedicated scanner: position your foot correctly. You generally want to scan it in a non-weight-bearing state, perhaps with a slight arch support already in place (like a rolled towel under your arch) if you know you need significant lift. This prevents your arch from collapsing under its own weight during the scan, giving you a more accurate representation of its ideal supported shape. Some people even put their foot in a foam box and then scan the impression, which is another clever trick for capturing ideal supported shape. Experimentation is key!
Step 2: From Scan to Sculpt – Cleaning Up Your Model
Once you have your raw 3D scan, it's rarely perfect. There might be holes, noise, or extraneous bits of the floor in the model. This is where 3D modeling software comes in. Don't panic, it's not as scary as it sounds. For basic cleanup, tools like Meshmixer (free!) are fantastic. You can fill holes, smooth surfaces, and trim away unwanted parts. If you're feeling a bit more adventurous, Blender (also free and incredibly powerful) or Fusion 360 (free for hobbyists and small businesses) can do the job and much, much more. The goal here is to get a clean, solid 3D model of the bottom of your foot, ready to be turned into an insole.
Step 3: Designing Your Dream Insole – The CAD Magic
Now for the fun part: designing the insole itself! You've got your foot scan, which is essentially the negative space you need to fill. You'll typically use CAD software for this. Fusion 360 is my go-to for pretty much everything, and it's perfect here. The basic workflow involves:
- Importing your cleaned foot scan.
- Creating a base "slab" for the insole.
- Using the foot scan as a guide to sculpt the top surface of that slab. You're basically creating a positive mold of the bottom of your foot.
- Adding features like arch support (this is critical!), a heel cup, and potentially forefoot cushioning.
- Defining the thickness of the insole. This will depend on your shoes and the material you're printing with.
- Trimming the overall shape to fit comfortably inside your shoe. You can even print a thin template first to check the fit in your shoe before committing to a full insole print.
There are also some fantastic resources online where people have shared parametric insole designs that you can adapt. You basically take their base design and then morph it using your foot scan data. It's a bit like having a ready-made template that you customize, which can save a lot of time if you're new to CAD for organic shapes.
Step 4: Choosing Your Filament – The Flex Factor
This is where filament choice becomes absolutely paramount. You can't just print an insole out of regular PLA; it'll be hard as a rock and crack in no time. You need something flexible, durable, and comfortable. And for that, there's really only one choice:
TPU (Thermoplastic Polyurethane)!
TPU is a flexible, rubber-like filament that's perfect for insoles. It has excellent abrasion resistance, good compression characteristics, and it's comfortable against the skin. You'll want to look for TPU with a Shore Hardness that's suitable for insoles – something in the 95A range is a good starting point. Softer TPUs might be too squishy, and harder ones might not offer enough shock absorption. Brands like e-SUN, Overture, and Eryone are readily available here in India and offer good quality TPU. I've personally had great results with e-SUN's eLastic and Overture's TPU. It's a bit more challenging to print than PLA, but totally manageable once you dial in your settings. You can find a good selection of TPU filaments on Amazon.in: TPU Filament on Amazon.in.
Step 5: Printing Your Custom Insoles – The Art of Flexibility
Printing with TPU requires a bit of patience and some specific settings. Here's a quick rundown of what I typically do on my Ender 3 V2 or my Anycubic Kobra:
- Slower Speeds: TPU loves to stretch and blob if you print too fast. I usually go for 20-30 mm/s.
- Higher Temperatures: Generally, you'll need slightly higher hotend temperatures than PLA – think 220-235°C. The bed temperature around 50-60°C works well.
- Direct Drive Extruder is King: If you have a direct drive extruder, TPU printing is much easier. Bowden setups can work, but you'll need to reduce retraction significantly (or even turn it off entirely) to prevent jams and stringing.
- Retraction: Keep it minimal (0.5-1mm) and slow (15-25 mm/s) if you have a Bowden. With direct drive, you can usually get away with a bit more.
- Cooling: A little bit of cooling (20-50%) helps with overhangs and overall print quality.
- First Layer: Get that first layer perfect! A slight squish helps with adhesion. I usually print with a brim to ensure good bed adhesion throughout the print.
- Infill: Experiment with infill patterns and densities. A gyroid infill at 15-25% can provide a good balance of flexibility and support.
It will take a few tries to get your TPU settings just right for your specific printer and filament brand. Don't get discouraged! The first few prints might be stringy messes, but once you dial it in, it’s smooth sailing. And hey, that's part of the fun of DIY 3D printing, isn't it? Figuring things out.
Step 6: Test, Tweak, Repeat!
The first pair you print probably won't be perfect. And that's totally okay! This is the beauty of 3D printing. If the arch support isn't quite right, or the heel cup feels off, you just go back to your CAD model, make adjustments, and print again. This iterative process is what allows you to achieve that truly custom fit that no off-the-shelf insole can offer. I've gone through maybe three or four iterations for my own feet until I found that sweet spot. It feels like walking on clouds now, honestly.
Think about it: for the cost of a few spools of TPU (around ₹2,000 - ₹3,000 for a couple of good spools) and maybe a month of trial and error, you can have perfectly custom insoles for all your shoes. Compare that to thousands for professional orthotics, and it's a no-brainer for any maker. Plus, you gain a whole new skill set in scanning and advanced CAD!
My Takeaway, and How We Can Help You
This whole journey has been incredibly rewarding. Not only have I found immense relief for my own feet, but it's also opened my eyes to the incredible potential of 3D printing in personalized healthcare. It’s not just about printing keychains or cool models (though we love those too at ArtOpia Collections!). It's about solving real-world problems and improving quality of life, one comfortable step at a time.
In my opinion, this DIY approach to custom orthotics is one of the most practical and impactful applications of desktop 3D printing right now. It democratizes access to something that was traditionally very expensive and exclusive. If you're struggling with foot pain or just want to experience truly personalized comfort, I highly encourage you to give this a try. And if you're not ready to dive into the scanning and CAD yourself, but love the idea of custom-fit items, remember that ArtOpia Collections is here to help bring your custom 3D printed ideas to life. Maybe we can even discuss how to get you a custom-scanned insole if you're local!
So, go on, liberate your feet from the tyranny of generic insoles. Your future self (and your knees, and your back) will thank you. Happy printing, and even happier walking!