Using RealityScan by Unreal Engine for Free Photogrammetry
Discover how Unreal Engine's RealityScan app revolutionizes free photogrammetry, letting you create stunning 3D models from real-world objects using just your smartphone. This guide will walk you through the simple steps to capture and generate high-quality 3D assets without cost.

Alright, so picture this: You’re scrolling through Instagram, minding your own business, and BAM! Someone’s posted an incredible 3D print, perfectly detailed, looks like it was scanned straight from a museum artifact. And you, like me, are probably thinking, “Man, how do they get those super complex models without spending a fortune on a fancy 3D scanner?” Because let's be real, those industrial-grade scanners? They cost more than my entire workshop, probably more than my car (if I even had one that fancy, ha!). Well, my friends, I’ve been on a quest, a true journey, to find an affordable, actually usable solution for photogrammetry, and I think I've finally hit the jackpot, or at least found a really, really good contender. We're talking about RealityScan by Unreal Engine, and the best part? It's FREE. Like, absolutely zero rupees. And honestly, it’s a game-changer for small businesses like mine, ArtOpia Collections, trying to bring unique, high-detail prints to life without breaking the bank. So, grab a cup of chai, settle in, because I'm about to spill all the beans on how this app is letting me scan real-world objects with just my phone, and how it can totally transform your 3D printing game too.
The Photogrammetry Dream: Why I Needed a Solution
For those of you who aren't knee-deep in 3D jargon every single day, photogrammetry is basically the art and science of creating 3D models from 2D photos. You take a bunch of pictures of an object from different angles, feed them into some clever software, and BOOM! A 3D model emerges. It’s like magic, but with math. Now, for my business, ArtOpia Collections, I'm always looking for ways to create unique, custom pieces. Sometimes a client comes to me with an antique artifact, maybe a family heirloom, and they want a miniature replica. Or maybe I find a really cool, intricate rock on a hike and think, "Man, this would make an awesome texture for a diorama!" The problem has always been getting that physical object into a digital, printable format without, you know, commissioning a full-blown VFX studio.
I've tried a few things over the years. Back in the day, I even experimented with some really clunky open-source photogrammetry software on my PC. It was a nightmare. The setup was complicated, the processing times were agonizingly long (we're talking hours for a basic object), and the results? Let’s just say they often looked like something a particularly dizzy octopus had tried to model. Not exactly what my customers are paying for. And then there were the paid solutions, which, as I mentioned, felt like they were priced for NASA, not for Vidyut from Mumbai trying to run a small business. I mean, who has ₹50,000 to ₹1,00,000 just lying around for a scanner, especially when that money could buy me, like, ten spools of high-quality eSun PLA+ or upgrade my Ender 3 V2 with a direct drive? It just didn't make sense for my budget, and I bet it doesn't make sense for yours either.
Enter RealityScan: A Glimmer of Hope
So, when I first heard about RealityScan, developed by Epic Games (the folks behind Unreal Engine and Fortnite), my ears perked up. They were promoting it as a free, mobile-first photogrammetry app. My immediate thought was, "Yeah, right. 'Free' usually means 'barely functional' or 'comes with a million hidden catches'." But because I'm stubborn and always looking for an edge, I decided to give it a shot. And boy, am I glad I did! This isn't just "functional"; it's surprisingly good, especially for the grand price of absolutely nothing.
The thing is, it's designed to be super user-friendly. You just download the app, sign in with your Epic Games account (which, if you've ever played Fortnite, you probably already have), and you're good to go. No complex calibration, no fancy lighting rigs required (though good lighting always helps, obviously). It basically guides you through the whole process, step by step.
My First Dive: How I Used RealityScan
I decided to test it on a small, intricate Buddha statue I have on my desk. It’s about 6 inches tall, with lots of small details – folds in the robes, facial features, a textured base. Perfect for a real challenge. Here's roughly how it went:
- Preparation: I placed the statue on a plain, non-reflective surface, an old cardboard box, actually. I made sure there were no busy patterns in the background, and the lighting was even. I used natural daylight near a window, plus a cheap LED ring light I got from Amazon for about ₹1,500 (check out some options here, they're surprisingly useful for this stuff!).
- Scanning with the App: The app gives you a live view with an overlay that tells you when you're too close, too far, or moving too fast. It's brilliant! You just start taking pictures, slowly orbiting your object. It even shows you a visual representation of your photo coverage, like a little heatmap, so you know where you need more shots. I took about 150 photos for the Buddha statue, moving around it at different heights – ground level, eye level, and even slightly above.
- Uploading & Processing: Once I was done, I hit "Upload." This is where the magic (and the cloud) happens. The app sends all your photos to Epic Games' servers for processing. Now, this can take a while, depending on your internet speed and how busy their servers are. For my 150 photos, it took about 20-30 minutes to upload and then another 15-20 minutes for the actual 3D model generation. Not bad at all, considering my PC would have chugged for hours!
- Reviewing the Model: Once processed, you get a notification. You can then view the 3D model directly in the app. And honestly, I was blown away. The detail was incredible for something I'd scanned with my phone. The folds in the robes were clearly defined, the facial features were recognizable, and the overall shape was spot on.
What I Loved (and a Couple of Quirks)
The Good Stuff:
- It's FREE: Seriously, this is the biggest selling point. No subscriptions, no hidden costs. Unreal Engine is basically giving us access to professional-grade photogrammetry tech for nothing.
- Ease of Use: The interface is intuitive. Even if you've never done photogrammetry before, the app guides you. It’s almost like a game, which makes sense coming from Epic Games.
- Mobile-First: Using my phone (I'm on a OnePlus 9, nothing super high-end) means I can scan almost anywhere. No need to lug around a fancy camera or a tripod.
- Quality: For a phone app, the detail you get is surprisingly high. It won't replace a ₹5 lakh industrial scanner, but for 3D printing, especially FDM, it's more than enough.
- Direct Export: You can export the model directly as an OBJ or FBX, which are standard formats that work with pretty much any 3D software (Blender, MeshMixer, PrusaSlicer, Cura, you name it).
A Few Quirks (Because nothing's perfect, right?):
- Internet Dependency: You absolutely need a good internet connection for the upload and processing. If your Wi-Fi is patchy (like mine sometimes is in the evenings), it can be a bit frustrating.
- Object Limitations: It struggles with shiny, reflective, or transparent objects. That’s just the nature of photogrammetry, though. It relies on capturing surface details, and reflections mess with that. So, scanning a chrome bumper? Probably not gonna happen.
- Processing Time: While faster than my PC, the cloud processing isn't instantaneous. Patience is key, my friend.
- No Manual Control: The app takes care of everything, which is great for beginners, but advanced users might miss having manual control over camera settings or processing parameters. But hey, it's free!
Bringing Scans to the Printer: The Workflow
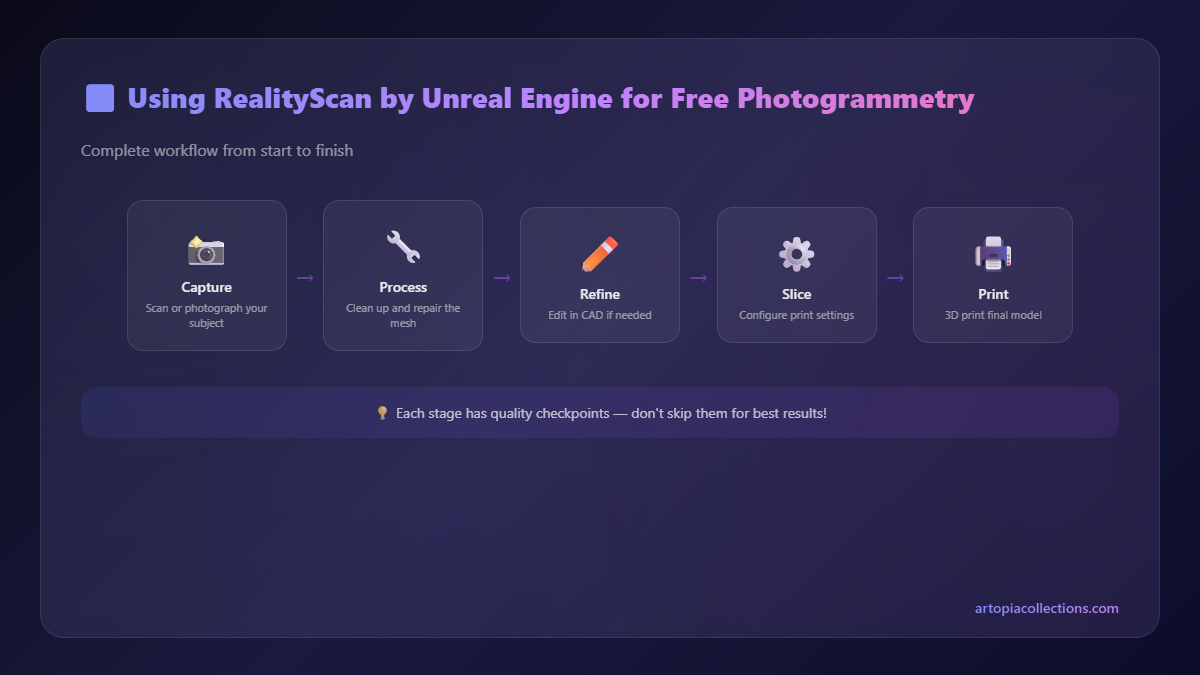
Once I had the OBJ file of my Buddha statue, the real fun began. Here’s a quick rundown of my typical workflow for getting these scans ready for my Creality Ender 3 V2 or my Prusa Mini+:
- Import into Blender: First things first, I import the OBJ file into Blender. RealityScan models usually come with a good texture map, which is awesome, but for FDM printing, we mainly care about the geometry.
- Cleanup & Optimization: Scanned models can sometimes be a bit messy. They might have holes, stray polygons, or a super high poly count that isn't ideal for printing. I use Blender's sculpting tools to smooth out any imperfections, fill holes, and then use the Decimate modifier to reduce the poly count without losing too much detail. MeshMixer is also a fantastic free tool for this kind of mesh repair and optimization, especially its "Make Solid" feature.
- Scaling & Orientation: I scale the model to my desired print size and make sure it's oriented correctly on the print bed. For the Buddha, I decided on a 10cm tall replica.
- Slicing: Finally, I export the cleaned-up model as an STL and load it into PrusaSlicer (my preferred slicer) or Cura. I dial in my usual settings: 0.16mm layer height, 15% infill, and a good quality PLA filament. For intricate models like this, I usually go with something like eSun PLA+ or Overture PLA, which are readily available here in India and give consistently good results. Sometimes, I even use something like the eSun Silk PLA for a nice finish.
- Printing: Hit print! And then I get to watch my little Buddha statue slowly materialize on the print bed. It’s still magical every single time.
I’ve used this process to scan various items – from old terracotta pots (to replicate their texture for custom designs) to even some really cool, unique wooden carvings I picked up from a local artisan. The ability to quickly and easily digitize real-world objects opens up a whole new world of possibilities for custom prints, personalized gifts, or even just expanding my own ArtOpia Collections product line without having to spend hours modeling things from scratch in CAD software. It's a huge time-saver, and time, as we all know, is money in the business world.
My Honest Verdict: Should You Use RealityScan?
Absolutely, 100%, without a shadow of a doubt, YES! If you're a 3D printing enthusiast, a small business owner, an artist, or just someone curious about photogrammetry, you have literally nothing to lose by trying RealityScan. It’s free, it’s powerful, and it democratizes access to a technology that was once prohibitively expensive. It might not be perfect for every single scenario (don't expect to scan your car perfectly), but for small to medium-sized, non-reflective objects, it’s a brilliant tool.
For me, as someone running ArtOpia Collections, it’s been a game-changer. It means I can offer more unique, custom-scanned items to my customers without investing a massive amount of capital in specialized hardware. It's truly empowering to know that my smartphone, something I already carry everywhere, can be transformed into a powerful 3D scanner, effectively shrinking the gap between the physical and digital worlds for my prints. So go ahead, download it, experiment, and let me know what amazing things you manage to scan and print. Trust me, you won't regret it!


