How to Upgrade Creality K1 Max Firmware for Better Performance
This guide walks you through upgrading your Creality K1 Max firmware to enhance its performance and unlock new features. Follow our simple steps to ensure a smooth and successful update for improved print quality.

Man, oh man, have you ever felt like your amazing Creality K1 Max, that beast of a printer you invested your hard-earned rupees in, just isn't quite hitting its stride? You know, like it's fast, sure, but sometimes the prints just aren't as buttery smooth as they *could* be, or maybe you're wrestling with some annoying little bug that pops up every now and then? Yeah, I've been there, trust me. It's like having a Ferrari in your garage but it's stuck in second gear, you know? You want to unleash its full potential, feel that raw power! Well, my friend, often the key to unlocking that hidden performance, especially with our beloved K1 Max, lies not in hardware tweaks (though those are fun too!), but in something far simpler, yet incredibly powerful: a firmware upgrade.
I remember when I first got my K1 Max, I was ecstatic. "Finally," I thought, "a coreXY that just *goes*!" And it did, it really did. But after a few weeks, printing some of my more intricate designs for Artopia Collections, I started noticing little quirks. Sometimes the first layer compensation wasn't perfect, or a random minor stutter, especially on really complex curves. And honestly, it just felt like it *could* be better, you know? Like the hardware was capable of so much more. That's when I decided it was time to dive headfirst into the world of firmware upgrades. And let me tell you, it was a game-changer. My K1 Max now prints like a dream, faster, cleaner, and with an almost zen-like consistency that makes my work so much easier.
Why Even Bother Upgrading Your K1 Max Firmware?
Look, I get it. The idea of fiddling with firmware can sound a bit intimidating, right? Like you're going to accidentally brick your expensive printer (a K1 Max costs a pretty penny, typically around ₹70,000-₹85,000 depending on sales and where you buy it, so no one wants to mess that up!). But here's the deal: modern firmware updates are less about danger and more about improvement. Think of it like a software update for your phone or computer. Creality, bless their hearts, are constantly refining things, fixing bugs, and adding new features.
For the K1 Max specifically, these updates often bring:
- Improved Print Quality: This is a big one. Better algorithms for input shaping, pressure advance, and motion control mean fewer artifacts, smoother walls, and generally prettier prints. My prints of delicate jewellery stands, for instance, saw a noticeable improvement in surface finish.
- Enhanced Speed and Reliability: While the K1 Max is already fast, firmware optimization can make it even more efficient, sometimes shaving off precious minutes (or even hours on really big prints) without sacrificing quality. Plus, stability fixes mean fewer failed prints, which saves you filament and time – and believe me, when you're running a business, every saved spool of good quality e-Sun or Overture PLA counts, especially when a 1kg roll can set you back ₹1800-₹2500!
- New Features: Sometimes Creality throws in cool new functionalities that weren't there before. Maybe better camera integration, improved web UI, or more advanced calibration routines. You never know what goodies they'll pack in!
- Bug Fixes: This is a no-brainer. If there are known issues, a firmware update is usually the cure. Remember that weird Z-offset bug some K1 users faced? Firmware fixed it!
- Better User Experience: Smoother touchscreen responsiveness, more intuitive menus, just generally making the printer feel more polished and enjoyable to use.
So, yeah, it's totally worth it. It’s like giving your K1 Max a fresh set of lungs and a smarter brain.
What You'll Need Before You Start
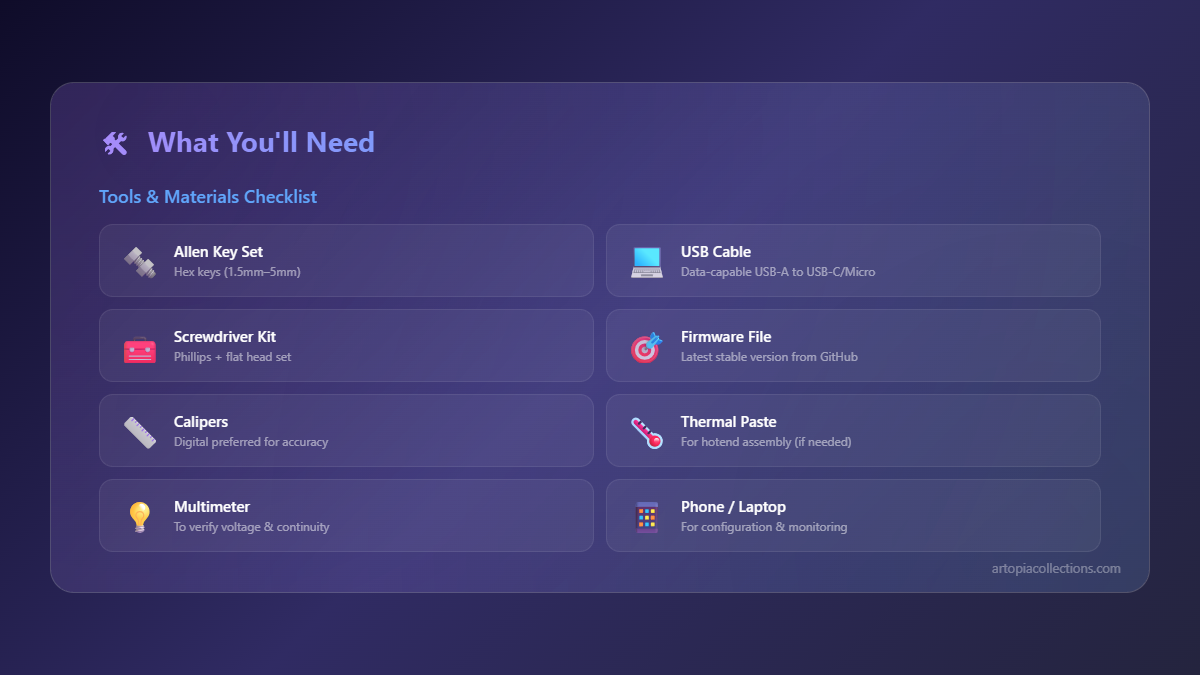
Okay, so you're convinced. You want those sweet, sweet performance gains. Awesome! Before we jump in, let's gather a few essentials. Don't worry, it's nothing fancy, probably stuff you already have lying around:
- A reliable USB drive: This is crucial. Don't use some ancient, dodgy pen drive you found in a drawer. Get a decent quality one, at least 8GB, formatted to FAT32. I personally prefer SanDisk or HP, something that won't give up on me mid-transfer. You can find good ones for around ₹400-₹800, like these Creality branded USB drives on Amazon.in which are often pre-formatted and tested.
- A stable internet connection: For downloading the firmware, obviously.
- Your Creality K1 Max: Powered on, naturally.
- A little patience and focus: This isn't rocket science, but you don't want to rush it.
- A good quality filament: Once you've updated, you'll want to test it out with some reliable material. I always keep some e-Sun PLA+ or a good local Indian brand of PLA on hand for testing. If you're looking for quality, check out e-Sun PLA+ on Amazon.in.
That's it! See, not so scary, right?
The Step-by-Step Firmware Upgrade Process (Creality Official Way)
Alright, let's get down to business. This guide focuses on upgrading to the official Creality firmware. While there are open-source Klipper alternatives out there that offer even deeper customization, for most users and for simplicity, sticking with Creality's official updates is the way to go. It's safer, more straightforward, and still provides massive improvements.
Step 1: Backup Your Configuration (CRITICAL!)
This is probably the most important step, and one many people skip. DO NOT SKIP THIS. Before you do anything, you need to back up your current printer configuration. Why? Because firmware updates can sometimes reset your settings – things like your Z-offset, bed mesh, network settings, and even your input shaper calibration. Having a backup means you can easily restore these values afterwards, saving you a ton of recalibration time.
Here’s how you typically do it on the K1 Max:
- Go to the printer's web interface (you know, the IP address you use to access it from your computer).
- Look for a "Configuration" or "Settings" section.
- There should be an option to "Backup Configuration" or "Download Configuration Files." Click it.
- Save the downloaded file (it's usually a ZIP archive or a few `.cfg` files) somewhere safe on your computer. I usually create a folder called "K1 Max Backups" with the date.
Trust me, this step will save you headaches. I learned this the hard way once, spent an hour re-calibrating everything. Never again!
Step 2: Download the Latest Official Firmware
Now, let's get the good stuff. You need to head over to the official Creality website. Specifically, look for their "Support" or "Download" section, and then navigate to the K1 Max page.
Make sure you're downloading the *correct* firmware for the *K1 Max*, not the standard K1. They're different. Also, always grab the latest stable version. Read any release notes they provide – sometimes there are specific instructions or warnings. Once you find it, download the firmware file (it's usually a `.zip` or `.bin` file) to your computer.
Step 3: Prepare Your USB Drive
Remember that reliable USB drive? Now's its time to shine.
- Insert the USB drive into your computer.
- Format it to FAT32. This is crucial. If it's not FAT32, the printer might not recognize the update. Most drives come pre-formatted, but it's good to double-check. (Right-click the drive in "My Computer"/"This PC," select "Format," and choose FAT32).
- Once formatted, create a new folder on the root of the USB drive named
firmware(all lowercase). - Extract the downloaded firmware file (from Step 2) into this
firmwarefolder. Make sure the actual firmware file (e.g.,K1MAX_V_x.x.x.x.bin) is directly inside this folder, not nested in another subfolder.
Step 4: Initiate the Upgrade on Your K1 Max
Okay, moment of truth!
- Power off your Creality K1 Max completely. Use the physical switch at the back.
- Insert the prepared USB drive into the USB port on the front of your K1 Max.
- Now, power the printer back on.
- The printer should automatically detect the firmware file on the USB drive. You'll usually see a prompt on the screen asking if you want to update. Confirm it.
- Let the process run. DO NOT POWER OFF THE PRINTER OR REMOVE THE USB DRIVE DURING THIS TIME. It might take a few minutes, and the screen might go blank or show progress bars. Just be patient.
- Once the update is complete, the printer will usually reboot itself. You might get a message saying "Update successful" or something similar.
Step 5: Post-Upgrade Calibration and Restoration
Congrats, you've successfully updated the firmware! But we're not quite done yet. Now it's time to get everything dialed back in for optimal performance.
- Remove the USB drive. You don't want the printer trying to update again next time you power it on.
- Restore your configuration: Go back to your printer's web interface (or directly on the touchscreen if the option is there). Find the "Restore Configuration" or "Upload Configuration" option and use the backup file you saved in Step 1.
- Re-calibrate everything: Even after restoring, it's *always* a good idea to perform a full calibration.
- Run a full Auto-Leveling (bed mesh).
- Run the Input Shaper calibration (if your K1 Max has the built-in accelerometer – which it should!). This is critical for high-speed printing.
- Verify your Z-offset. A small adjustment might be needed. Print a first layer test to be sure.
- Double-check your Pressure Advance settings (usually found in the Klipper config files if you access via SSH, or through the web interface).
Doing these calibrations ensures that your newly updated firmware works in perfect harmony with your specific printer's hardware and environment. It's like fine-tuning a guitar after putting on new strings.
The Sweet Rewards of an Upgraded K1 Max
After all that, it's time to reap the benefits! Fire up a test print. Something you've printed before, maybe a complex model or something with intricate details. I guarantee you'll notice the difference. Smoother movements, quieter operation sometimes, and a definite bump in print quality.
I distinctly remember printing a series of miniature architectural models for a client after an update, and the details were just crisper, the overhangs cleaner. It makes a huge difference, especially when you're producing items for sale like we do at Artopia. When your tools are perfectly optimized, your output just shines that much brighter. It means fewer re-prints, less wasted filament, and happier customers – which, let's be real, is what every small business owner dreams of!
So, don't be afraid. Upgrading your K1 Max firmware isn't just a technical chore; it's an investment in your printer's performance and, ultimately, in the quality of your 3D printed creations. Give it a shot, you won't regret it!


