How to Install a Direct Drive Extruder on Your Ender 3 Pro
Upgrading your Ender 3 Pro with a direct drive extruder can significantly improve print quality and reduce common filament issues. This guide provides a clear, step-by-step process to ensure a smooth and successful installation.

Chalo, dosto! Let's talk about something that seriously changed my 3D printing game, especially when it comes to those super squishy, notoriously tricky flexible filaments. You know the ones – TPU, TPE, all those stretchy beauties that make your Bowden setup weep. For ages, I struggled. Stringing, clogs, inconsistent extrusion, the whole nine yards. I was about to throw my Ender 3 Pro out the window, honestly. But then, a little light bulb went off (or rather, a YouTube video clicked) – direct drive. And man, oh man, it was like someone flipped a magic switch!
If you're anything like me, running a small business, ArtOpia Collections, from my home here in India, every print needs to be as perfect as possible. Wasted filament isn't just a nuisance; it's money down the drain. And for a passion project that's slowly turning into a livelihood, that really stings. So, after a lot of research, a bit of saving (because, let's be real, every rupee counts!), and a brave leap, I decided to take the plunge and convert my beloved Ender 3 Pro to direct drive. And today, I'm going to walk you through exactly how you can do it too, step-by-step, no BS, just like I did it.
First off, why bother with direct drive? Look, the Ender 3 Pro is a fantastic machine, especially for its price point here in India, usually around ₹18,000-₹22,000 depending on sales and where you buy it from. But its stock Bowden setup, where the extruder motor pushes filament through a long PTFE tube to the hotend, has its limitations. For rigid filaments like PLA or PETG, it's generally fine. But when you introduce flexible materials, that long tube becomes a nightmare. The filament compresses, buckles, and basically does everything but smoothly feed into your hotend. Direct drive, as the name suggests, mounts the extruder motor directly above or very close to the hotend. This drastically reduces the distance the filament has to travel, giving you much better control.
What does that mean for you? Well, for starters, dramatically improved performance with flexible filaments. No more clogs mid-print with TPU! You'll also see less stringing on other filaments because you can use much lower retraction distances. Think about it: less path for the filament to retract through, less time for oozing. And honestly, I personally think it just feels more robust, more professional. You get better precision, especially with tiny details.
Okay, sold? Good! Let's get down to business. Here's what you'll need before we even touch your printer.
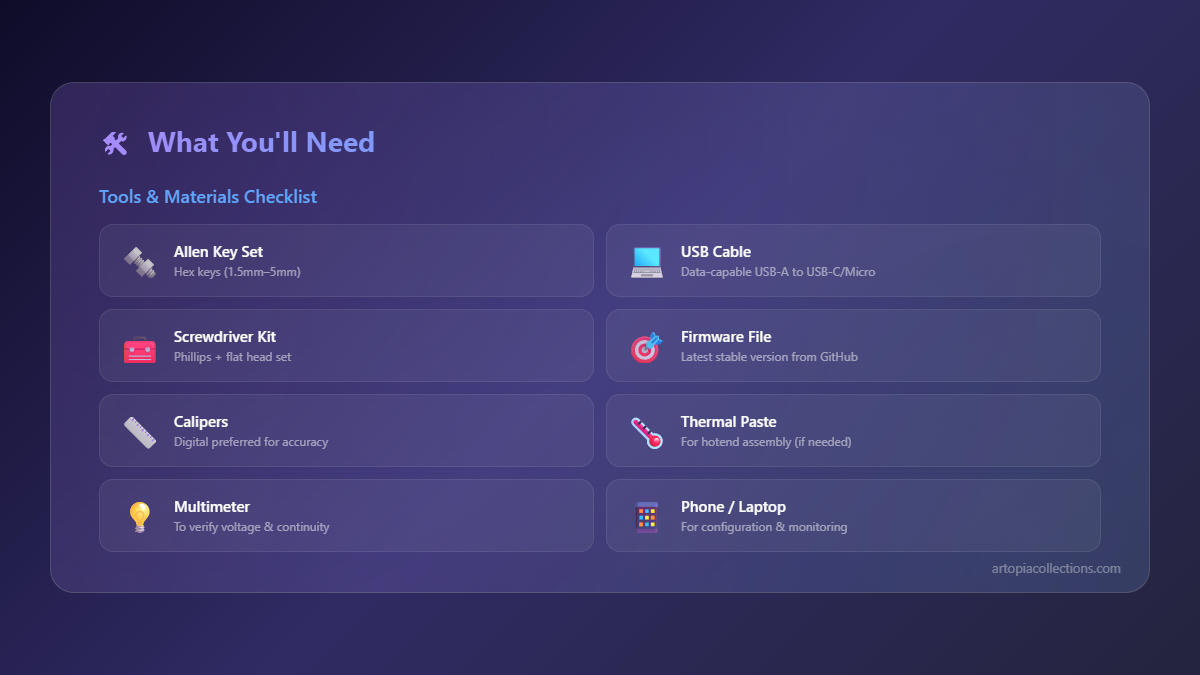
What You'll Need For This Upgrade
- A Direct Drive Extruder Kit: This is the core of your upgrade. There are many options out there. I went with a Creality official kit, but there are also third-party ones. Just make sure it's compatible with the Ender 3 Pro. You can often find them on Amazon.in for anywhere between ₹2,500 to ₹5,000. This Creality Official Direct Drive Extruder Kit is a popular choice and pretty reliable.
- Basic Toolkit: Your Ender 3 Pro usually comes with one. You'll need Allen wrenches (hex keys), a screwdriver, and maybe some pliers.
- Wire Cutters/Strippers: Some kits might require extending wires.
- Zip Ties: For cable management, a must-have!
- Firmware Knowledge (Optional but Recommended): While many direct drive kits don't *require* a firmware update if you can adjust E-steps via your printer's menu, it's good to know how to do it in case you need to fine-tune other settings or if your kit replaces the stepper motor entirely.
- Patience: Seriously, this isn't a race. Take your time.
Before you even think about grabbing a screwdriver, power off your printer and unplug it from the wall! Safety first, always. We're messing with electronics and hot parts here. Don't be a hero.
Step 1: Disassemble the Old Bowden Extruder Setup
This is where we start clearing out the old to make way for the new. It's not as scary as it sounds, trust me.
- Remove the Bowden Tube: At both ends (the hotend and the original extruder assembly), there are small couplers. Push down the plastic ring on the coupler and pull the PTFE tube out.
- Unscrew the Hotend Fan Shroud: There are usually two or three small screws holding the plastic fan shroud to the X-carriage. Take them out carefully. You'll need to disconnect the fan wires (and maybe the hotend thermistor and heater cartridge wires if they're tied to the shroud) if your direct drive kit comes with a new hotend or requires you to move these. Take a photo before disconnecting anything so you remember where it all goes!
- Remove the Old Extruder Assembly: This is the stepper motor and the plastic lever mechanism where your filament usually loads. It's typically mounted on the left side of the Z-axis gantry. Unplug its stepper motor cable. Unscrew the two bolts holding the motor and the extruder arm assembly to the bracket. You can keep the motor if your kit only replaces the mechanism, or set it aside if your new direct drive comes with its own motor.
- Clear the X-Carriage: Basically, you want the X-carriage (the part that moves horizontally and holds your hotend) to be as bare as possible, except for the hotend itself, of course.
And that's it for taking things apart! See? Not too bad, right? Take a deep breath. We're halfway there, in terms of preparation.
Step 2: Install the Direct Drive Extruder Assembly
Now for the exciting part – bolting on the new goodness! Your kit will come with specific instructions, but here's the general gist.
- Mount the New Bracket/Assembly: The direct drive kit will usually have a new bracket that attaches to your X-carriage. This bracket will either integrate a new stepper motor, or it'll have a spot for you to mount your existing stepper motor (if the kit only provides the gearing and housing). Bolt this firmly to the X-carriage. Make sure it's snug, but don't overtighten anything.
- Attach the Extruder Mechanism: Whether it's a BMG clone, a single gear setup, or something else, mount the actual extruder gear and tensioning mechanism to the bracket. This is where the filament will be gripped and pushed.
- Connect the Hotend: If your kit came with a new hotend, install it now. If you're reusing your existing hotend, make sure it's securely attached to the new direct drive bracket. The goal is to have the filament path from the extruder gears to the hotend's entry as short and straight as possible.
- Wire it Up: This is crucial.
- Stepper Motor: Plug the stepper motor cable into your new direct drive motor. If your new motor has a different connector or needs an extension, you might have to use wire crimpers or adapters provided in the kit.
- Fans, Heater, Thermistor: Reconnect all the hotend fans, the heater cartridge, and the thermistor. Again, refer to your earlier photo if you're unsure. Make sure everything is securely plugged in and nothing is loose. Loose connections can lead to all sorts of nightmares, from thermal runaways to print failures.
- Cable Management: Use those zip ties! Route your cables neatly and ensure they have enough slack for the X and Z axes to move freely without snagging. This isn't just for aesthetics; it prevents wear and tear on your wiring.
And that's basically it for the hardware! It might look a bit different, a bit chunkier up top, but it's all there.
Step 3: Firmware & Calibration – The Software Magic
This is arguably the most important step for getting good prints with your new direct drive. Don't skip it!
- Adjust E-Steps: Your original Bowden extruder had a certain number of steps per millimeter (E-steps) to push filament. A direct drive extruder, especially if it has different gearing (like a geared extruder), will almost certainly need a different value.
- Calculate New E-Steps: The easiest way is to find the recommended E-steps for your specific direct drive kit. For example, a common value for BMG clone geared extruders is around 400 E-steps/mm, while a standard direct drive might be closer to 93-100.
- Change E-Steps: You can usually do this directly from your Ender 3 Pro's LCD menu:
Control -> Motion -> E-steps/mm. Change the value, then save settings (Control -> Store Settings). - Calibrate E-Steps (The Right Way):
- Heat your hotend to printing temperature (e.g., 200°C for PLA).
- Mark your filament 120mm from the entry point of your extruder.
- Using the printer's menu, tell it to extrude 100mm of filament (e.g.,
Control -> Move Axis -> Extruder -> 100mm). - Measure the remaining filament from your mark to the entry point. Let's say you have 25mm left. This means it extruded 120mm - 25mm = 95mm.
- Calculate your new E-steps: (Current E-steps * 100) / Amount Actually Extruded. So, if your current E-steps were 93, it would be (93 * 100) / 95 = 97.89.
- Update E-steps in your printer menu again and save. Repeat this until it consistently extrudes exactly 100mm.
- PID Tune Your Hotend: Because you've added weight to the hotend carriage and possibly changed fan directions, your hotend's thermal characteristics might have changed. PID tuning helps your printer maintain a stable hotend temperature.
- Connect your printer to a computer with OctoPrint or Pronterface.
- Send the command:
M303 E0 S200 C10 U1(E0 for hotend, S200 for 200°C, C10 for 10 cycles, U1 to save). - Wait for it to finish. Your printer will restart or indicate it's done.
- Adjust Retraction Settings in Your Slicer: This is a big one! Since the filament path is now super short, you need much lower retraction distances. I usually start with something like 0.5mm to 1.5mm at 25-40mm/s. Your Bowden setup might have used 5-7mm. Go too high with direct drive, and you'll get clogs. Experiment with a retraction test print until you find your sweet spot for your preferred filament.
Step 4: Bed Leveling & First Print
Almost there! Now that everything's calibrated, it's time for the final checks.
- Level Your Bed: The added weight of the direct drive might slightly change how your gantry sags, or just make it a good idea to re-level. Do a thorough manual bed level. I personally use the paper method and then fine-tune with a single-layer calibration print.
- Load Filament: Load your favorite filament. I often start with some good old PLA filament from brands like eSun, Overture, or even some decent local Indian brands like 3DPrintronics or Printr for initial testing.
- First Test Print: Start with something simple. A calibration cube, a small benchy, or even just a simple test line. Watch it like a hawk. Check for good first layer adhesion, smooth extrusion, and no obvious issues.
Congratulations! You've successfully converted your Ender 3 Pro to direct drive. Now go print some TPU and see the magic for yourself! I mean, seriously, printing phone cases, drone parts, flexible hinges – it opens up a whole new world of possibilities for what you can create for yourself or for your customers at ArtOpia Collections. We use direct drive for so many of our intricate designs.
Some Final Thoughts & Pro-Tips
- Fan Speeds: You might need to adjust your cooling fan speeds, especially for PLA, as the hotend assembly is now heavier and might retain heat differently.
- Z-Offset: If your hotend position changed slightly, you might need to adjust your Z-offset in your slicer to get that perfect first layer squish.
- Listen to Your Printer: Pay attention to any new noises, especially from the extruder motor. If it's clicking or skipping, it could mean your E-steps are too high, or your nozzle is partially clogged.
- Don't Be Afraid to Experiment: 3D printing is all about trial and error. Don't get discouraged if your first print isn't perfect. Tweak those settings, learn from your mistakes, and keep pushing forward.
Honestly, upgrading to direct drive was one of the best decisions I made for my Ender 3 Pro. It's transformed it from a good entry-level machine into a versatile workhorse, capable of tackling almost any filament I throw at it. The investment, both in terms of time and money, totally pays off in the long run with fewer failed prints and happier customers. Plus, the satisfaction of doing the upgrade yourself? Priceless, my friend, absolutely priceless.
So, what are you waiting for? Dive in! And if you have any questions or run into any snags, drop a comment below. I'm always happy to help a fellow enthusiast. Happy printing!


