How to Handle Custom Orders for 3D Printed Products Efficiently
Custom 3D print orders can be complex, requiring careful management from design to delivery. This guide provides actionable strategies to streamline your process, ensure client satisfaction, and maximize efficiency.

Cracking the Code: How I Handle Custom 3D Print Orders Like a Pro (Mostly!)
You know that feeling, right? That little ping in your inbox, or a WhatsApp message, and it's someone asking, "Hey, can you 3D print X for me?" For us 3D printing enthusiasts, especially those of us trying to make a little business out of our passion here in India, those words are pure gold. But let's be real, custom orders, while exciting, can also be a minefield of miscommunication, unrealistic expectations, and a whole lot of head-scratching. I've been there, trust me. I've had clients ask for a life-sized statue for ₹500, and others who think "designing" just means pressing a button. So, after a fair share of triumphs and, well, learning experiences, I’ve put together my playbook on how to handle custom 3D printing orders efficiently. And honestly, it’s mostly about communication, communication, and a little more communication!
The First Contact: Setting the Stage (and Your Sanity)
This is where it all begins. Someone reaches out, often with a vague idea or a low-res image they found online. My first goal? To understand exactly what they want, and more importantly, what problem they’re trying to solve. Don't just jump to "yes, I can print that!" Ask questions. Lots of them. Here’s what I usually cover:
- What is it? A replacement part? A unique gift? A functional prototype?
- What's its purpose? Will it hold weight? Be exposed to heat? Just sit on a shelf? This tells me a lot about material choice.
- Dimensions? Roughly, at least. A small figurine is vastly different from a large architectural model.
- Colour preference? This dictates the filament I'll need to use or buy.
- Deadline? Super crucial, especially in India where logistics can be... interesting.
- Do they have a 3D model (STL/OBJ file)? This is a game-changer. If they do, great! If not, that means design work, which changes everything.
And look, sometimes people come to you with absolutely no clue. They just know they want "something 3D printed." That's okay! It's our job to guide them. I usually start by showing them examples of what's possible, maybe some cool stuff from my own collections like these, to spark their imagination. The thing is, you need to manage expectations from the get-go. No, I can't print you a functional iPhone for ₹100. And yes, good design takes time and skill.
Quoting & Pricing: The Money Talk (Don't Be Shy!)
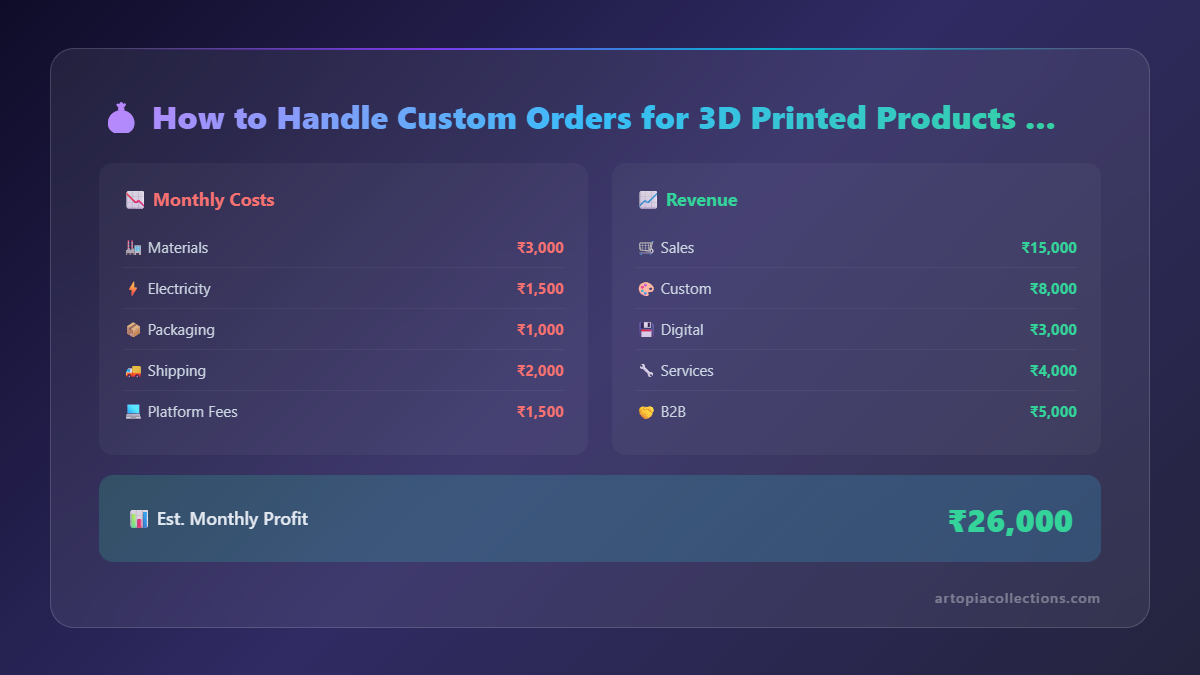 Ah, the dreaded quote! This is where many new businesses stumble. Don't undersell yourself, but also be fair. My pricing strategy is a mix of several factors:
- Design Time (if applicable): If they don't have a model, I charge for my time. My rate for design work usually ranges from ₹500 to ₹1500 per hour, depending on the complexity. Simple stuff in Tinkercad is on the lower end, complex mechanical parts in Fusion 360 are on the higher. I try to give an estimated design time upfront.
- Material Cost: This is straightforward. PLA filament generally costs me around ₹1500-₹2000 per kilogram from good brands like e-SUN or Overture. PETG is a bit more, maybe ₹1800-₹2500. I weigh the final print (or estimate based on the sliced model) and factor in a little extra for failed prints or supports. A typical small print might only use 10-20 grams, so I calculate based on cost per gram.
- Print Time: This is a big one. My Creality Ender 3 V2 and Anycubic Kobra 2 Neo are workhorses, but they aren't speed demons for everything. I run the model through PrusaSlicer or Cura, and it gives me a pretty accurate print time. I then charge an hourly rate for printer usage. For small, simple prints, this might be ₹20-₹50 per hour. For larger, more complex or high-quality prints, it can go up to ₹75-₹100 per hour, reflecting wear and tear, electricity, and my monitoring time.
- Post-Processing: Does it need sanding? Support removal? Painting? Assembly? Factor this labour in!
- Profit Margin: Don't forget this! You're running a business, not a charity. I usually aim for a 20-30% margin on top of all costs.
Once I have all these figures, I provide a detailed quote. I always ask for a 50% upfront payment for custom orders, especially if it involves significant design work or purchasing a specific filament colour I don't stock. This protects me if the client bails, and it also shows they're serious. And honestly, it saves me from holding onto custom prints for weeks hoping they'll pick them up.
The Design Dance: From Concept to STL
This phase is where the magic (or the mayhem) happens. If the client has an STL, my life is much simpler. I just do a quick check to ensure it’s manifold and printable. But if they need design work, here’s my process:
- Initial Sketch/Concept: Based on our discussions, I'll often do a quick hand sketch or a very rough 3D block-out. I send this to the client for initial approval. This prevents me from spending hours on a detailed design only for them to say, "Oh, that's not what I imagined."
- CAD Modelling: Once the concept is approved, I dive into the CAD software. For most functional parts, I'm in Fusion 360. For more organic or artistic stuff, I might dabble in Blender.
- Iterations & Feedback: This is critical. I'll send screenshots or even quick render images of the 3D model to the client at various stages. "How does this look?" "Are these dimensions correct?" Two to three rounds of minor revisions are usually included in my design fee. Anything beyond that, and we're talking extra charges – I make this clear upfront.
- Final Approval: Before I even think about hitting "print," I get explicit final approval on the 3D model. A simple "Looks perfect, proceed!" email or message works wonders as a paper trail.
One small tip: always design for printability. Think about overhangs, support structures, and part strength from the very beginning. It saves so much heartache later.
Pre-Print Prep: The Unsung Hero
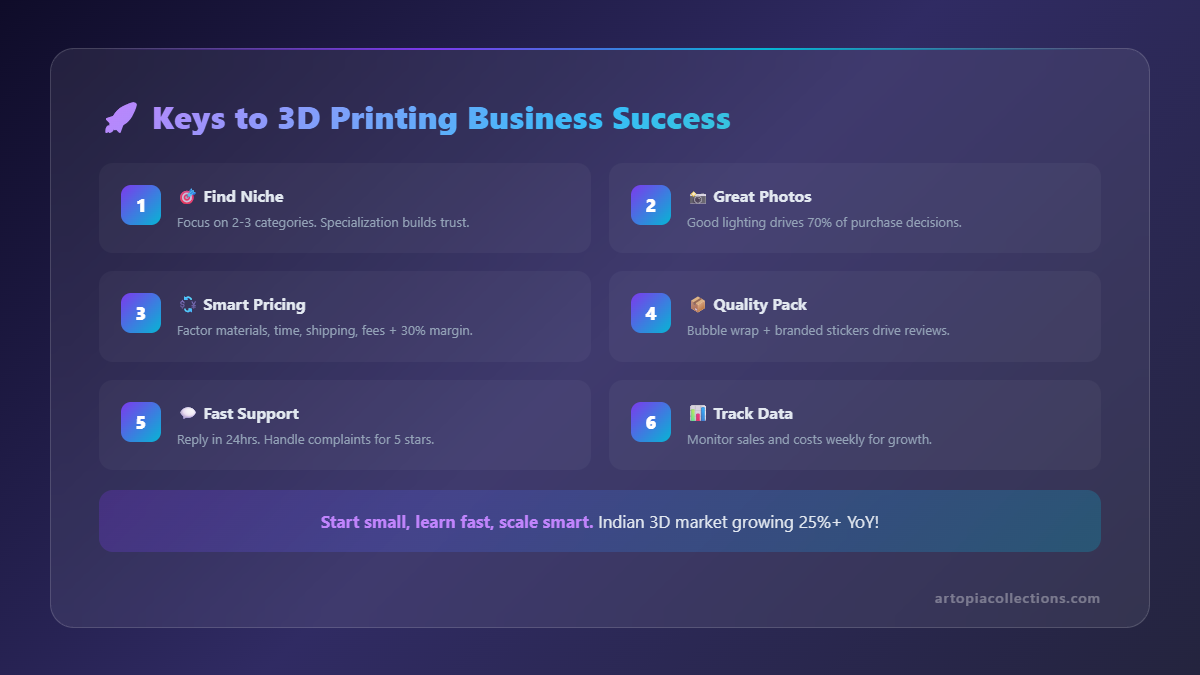 Okay, the model's approved. Time to slice! I use PrusaSlicer for pretty much everything now; I've found it gives me great control and excellent results on my machines. Here's what I'm looking at:
- Orientation: How the part sits on the print bed makes a huge difference to strength, print time, and support material.
- Supports: Minimal but effective. Nobody likes a print that takes longer to clean than to print!
- Infill: For most decorative items, 10-20% infill is fine. Functional parts might need 40-60% or even 100% for maximum strength.
- Layer Height: This dictates resolution. 0.2mm is my go-to for most stuff, 0.12mm for fine detail, and 0.28mm for quick prototypes where detail isn't paramount.
- Material Choice: PLA is great for most things, but if it needs to be tougher or slightly flexible, I might suggest PETG or even a TPU. I usually stock a range of e-SUN and Overture PLA and PETG. You can find some great multi-colour PLA bundles on Amazon.in here, which are super handy for small custom orders.
Sometimes, for really critical prints or if it's a new material, I'll run a small test print first. It might add an hour or two, but it's much better than wasting a whole day's print and a chunk of expensive filament.
The Print Job: Watching the Magic Happen (or Not!)
This is where my printers earn their keep. I make sure my beds are clean, leveled, and my filament is dry. I usually keep an eye on the first few layers, sometimes even the first hour, of a critical print. Thermal runaway protection, good bed adhesion, and well-tuned retraction settings are my best friends. My Ender 3 V2, with a few upgrades, is a reliable beast, and the Anycubic Kobra 2 Neo is surprisingly fast and accurate for its price point.
But let's be honest, print failures happen. It’s part of the game. When they do, I immediately assess why. Was it my fault (bad settings, bed adhesion)? Or something external (power cut)? If it's my fault, I just restart and absorb the cost. If it's something outside my control, and especially if it's a very large or expensive print, I communicate it to the client. Transparency is key. "Hey, had a power cut, looks like we need to restart the print, might add a day to the deadline, hope you understand!" Most people are pretty understanding when you're upfront.
Post-Processing & Quality Control: The Final Polish
Once the print is done, it's not quite over. Support removal is usually the first step. I've got a good set of flush cutters and some hobby knives. For smoother surfaces, especially with FDM prints, a bit of sanding can go a long way. Sometimes, clients want a painted finish. That's a whole other skill set, but I offer it for an additional fee. I always use a digital caliper (you can grab a decent one like this one on Amazon.in; it's essential for accuracy) to check critical dimensions against the model. I clean off any stringing or imperfections.
Before handing it over, I do a final quality check. Does it meet the client's expectations? Is it strong enough? Does it look good? I wouldn't give a customer something I wouldn't be happy with myself.
Delivery & Feedback: Closing the Loop
Packaging matters! Especially if you're shipping. I use bubble wrap, sturdy boxes, and make sure the print is well-protected. For local pickups, I still use a small box or bag to make it feel professional.
When the client receives the item, I always follow up. "How does it look?" "Are you happy with it?" This feedback is invaluable. It helps me improve, and it also builds goodwill. A happy customer is a repeat customer, and they're also your best marketing channel through word-of-mouth. Plus, it just feels good to know you made something cool for someone!
My Top 3 Takeaways for Custom Orders:
- Communicate Relentlessly: Over-communicate rather than under-communicate. Set expectations, give updates, ask for feedback.
- Value Your Time and Skills: Don't be afraid to charge fairly for design work, print time, and your expertise. Your passion is valuable!
- Document Everything: Emails, WhatsApp messages, payment confirmations – keep a record. It saves arguments down the line.
Honestly, handling custom orders can be one of the most rewarding parts of running a 3D printing business. Seeing someone's idea, sometimes just a scribble on a napkin, transform into a tangible object in their hands? That's pure joy. It's a continuous learning process, and every new client brings a new challenge. But with a systematic approach and a lot of patience (and coffee!), it's absolutely manageable. So go forth, fellow makers, and print some amazing stuff!
What are YOUR biggest challenges or best tips for custom orders? Let me know in the comments below! And hey, if you're ever looking for some inspiration, or just want to see what kind of cool stuff we print, check out our collections at artopiacollections.com/products!


